ListView는 가로(수평적)로 사용했을 때, 부모의 높이를 전부 사용한다. 근데, 부모가 Column위젯일 경우 에러가 나는데, 그 이유는 Column은 계속해서 수직으로 확장하려고 한다. 따라서 Column이 높이가 정해져 있지 않으니, 본인이 정해져 있는 높이가 없어서 그렇다.
Wrap 위젯
Column 위젯의 단점은, 수직으로 계속 넣기 때문인데, 최대 넓이에 도달함과 관계없이 커지기 때문에, 방지턱(오버플로우)가 일어난다. 그렇다면 최대 넓이가 도달하면 자동으로 다음 줄로 넘기고 싶을 때 사용한다.
Wrap위젯은 children 안에 자식들을 넣어주면 된다. spacing 속성값을 통해 자식들 사이 간격을 정한다. runSpacing 속성 값을 통해 줄단위 사이 간격을 정한다.
container의 기본 clip behavior를 생각하자. 자식은, 부모의 상황을 전부 알지 못한다. 특히, 부모의 모양을 모르기 때문에, Container의 모양에 맞게 범위에 벗어날 경우를 대비하여 자식이 범위 밖을 지나면 자동으로 잘라주는 clipBehavior를 설정할 수 있다.
ListView 더 알기
우리에게 스크롤 기능을 주는 ListView는 수직으로만 사용했는데, 우리가 주는 속성 값에 따라 수평으로도 사용이 가능하다. 기본값의 스크롤 방향이 수직으로 설정돼있던 것이다.
중심, 회전축의 뜻을 가지고 있는 Axis, ListView에는 scrollDirection 속성을 설정할 수 있는데, 요구되는 데이터 타입이 Axis이다.
ListView의 속성 중 scrollDirection의 기본값은 Axis.vertical 이기 때문에 수직 스크롤이 되는 것이다.
Q. 그러면, Axis.vertical만 Axis.horizontal로 바꿔주면 되는 것 아닌가요?
맞지만, 하나 더 해줘야 할 것이 있습니다. ListView의 특성상, 부모 위젯의 영향을 받기 때문에, 부모를 하나 만들어 사이즈를 정해주어야 합니다. ListView를 Axis.horizontal을 하게 되면, 높이가 무제한이 되기 때문에 사이즈 부모를 꼭 넣어줘야 합니다.
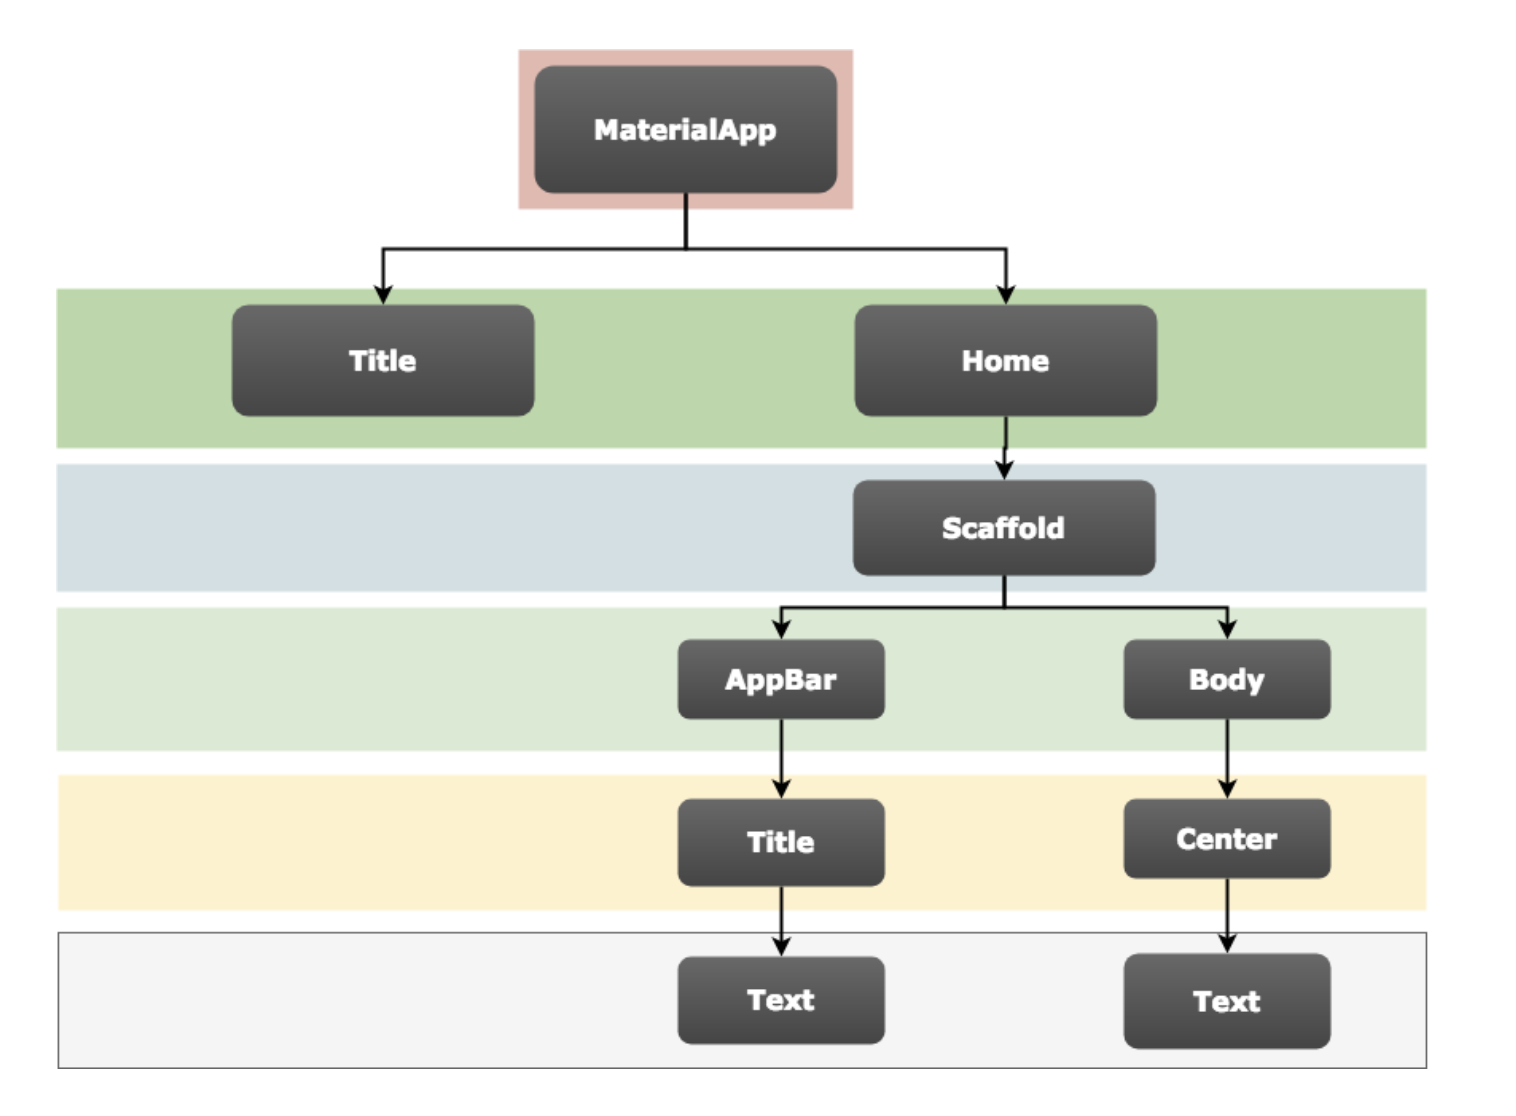
화면의 틀, 가운데 정렬을 위한 Center, 여백을 위한 Padding, 그리고 텍스트 삽입을 위한 Text 등 모두가 Widget이라고 이해하면 됩니다.
MaterialApp
MaterialApp은 구글 스타일의 디자인 틀을 제공하는 위젯입니다.
MaterialApp을 사용하기 위해서는 아래의 코드를 import해주어야합니다.
import 'package:flutter/material.dart';
CupertinoApp
CupertinoApp 애플 스타일의 디자인 틀을 제공하는 위젯입니다.
CupertinoApp을 사용하기 위해서는 아래의 코드를 import 해주어야 합니다.
import 'package:flutter/cupertino.dart';
Container 위젯
Container 위젯은 화면의 요소들을 담고 있는 하나의 박스로 비유할 수 있습니다.
width, height, color 등의 속성을 이용하여 박스의 크기와 색상을 설정할 수 있고, 내부에 여러 위젯들을 활용하여 내용을 구성하면 됩니다.
child
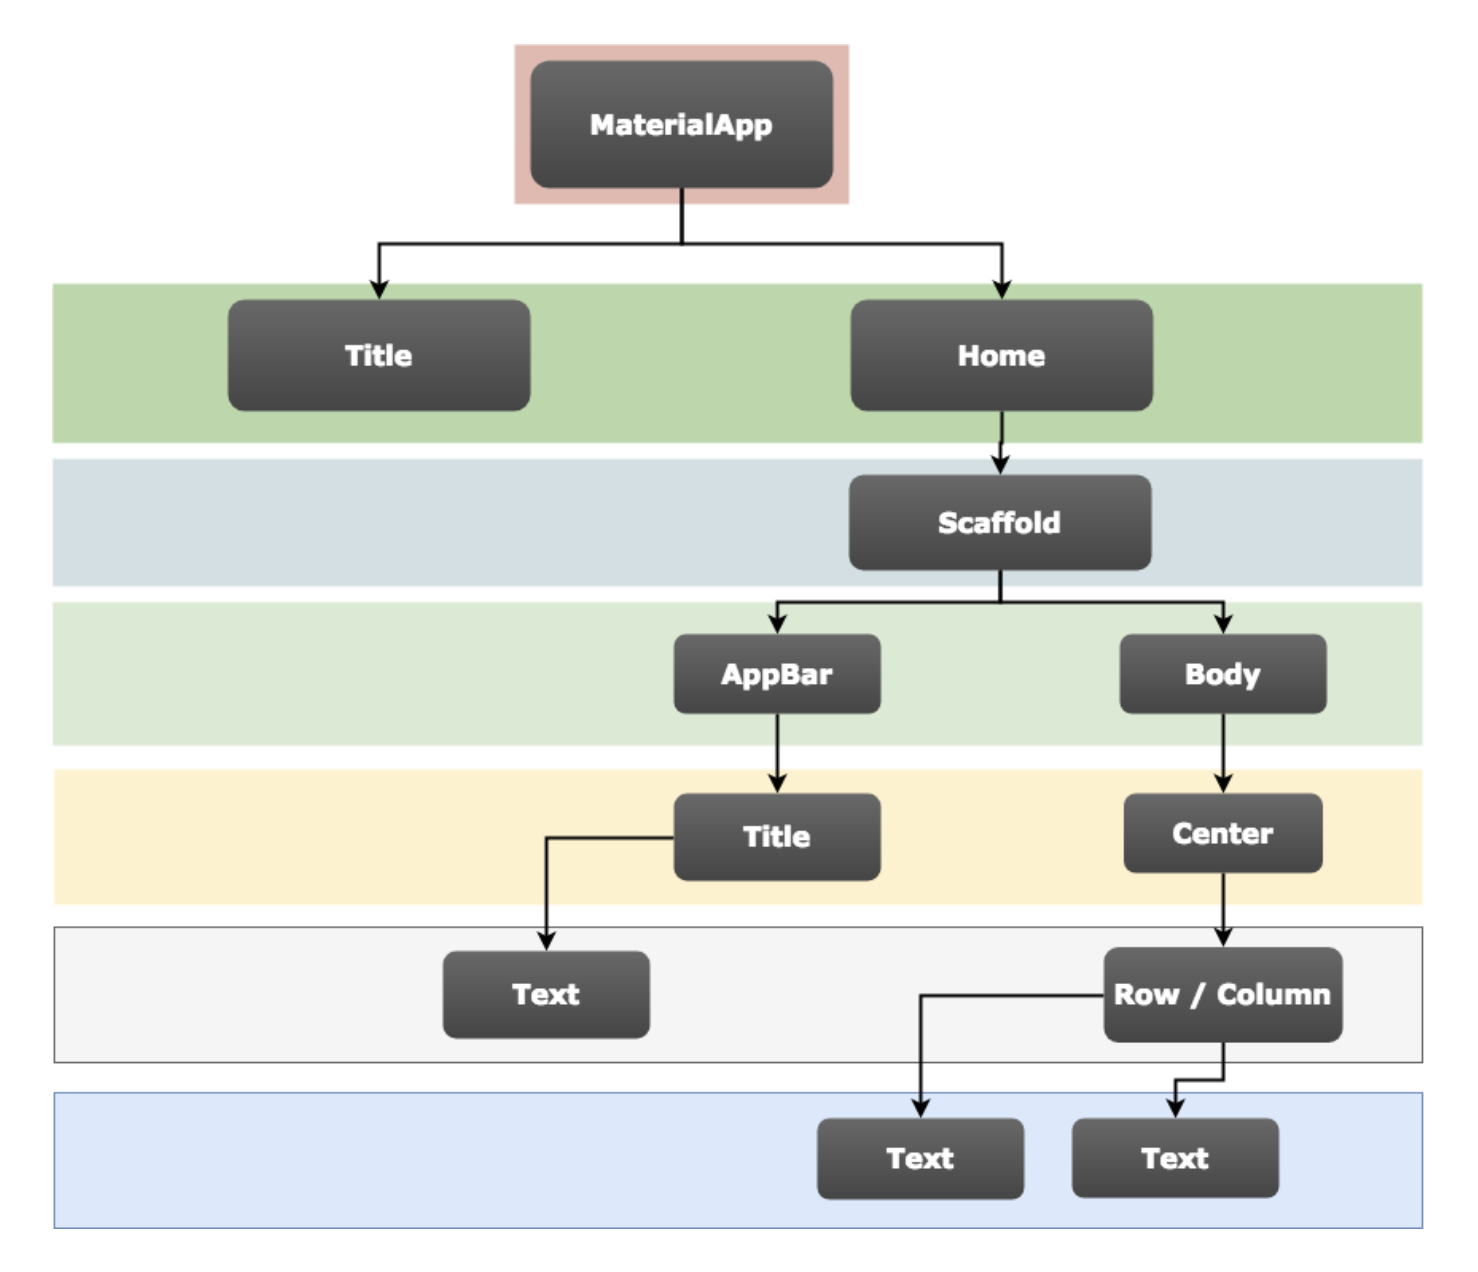
Material Design에서 body는 오로지 하나의 위젯만을 가집니다. 여러 가지 위젯을 내부에 포함시키기 위해서는, 위젯들의 배열을 내부에 가질 수 있는 타입의 위젯을 body의 child로 설정하는 것이 필요합니다. Flutter에서 위젯의 배열을 child로 가질 수 있는 여러가지 위젯들이 존재합니다. 여기서 사용하는 Row/Column 위젯도 이들 중 하나입니다.
Column은 세로로 배치하는 위젯이고, Row는 가로로 배치하는 위젯입니다.
보통 CrossAxisAlignment와 MainAxisAlignment의 여러 속성들 (ex. start, end, center, spaceEvently, spaceBetween 등)을 활용하여 알맞은 간격을 조정합니다.
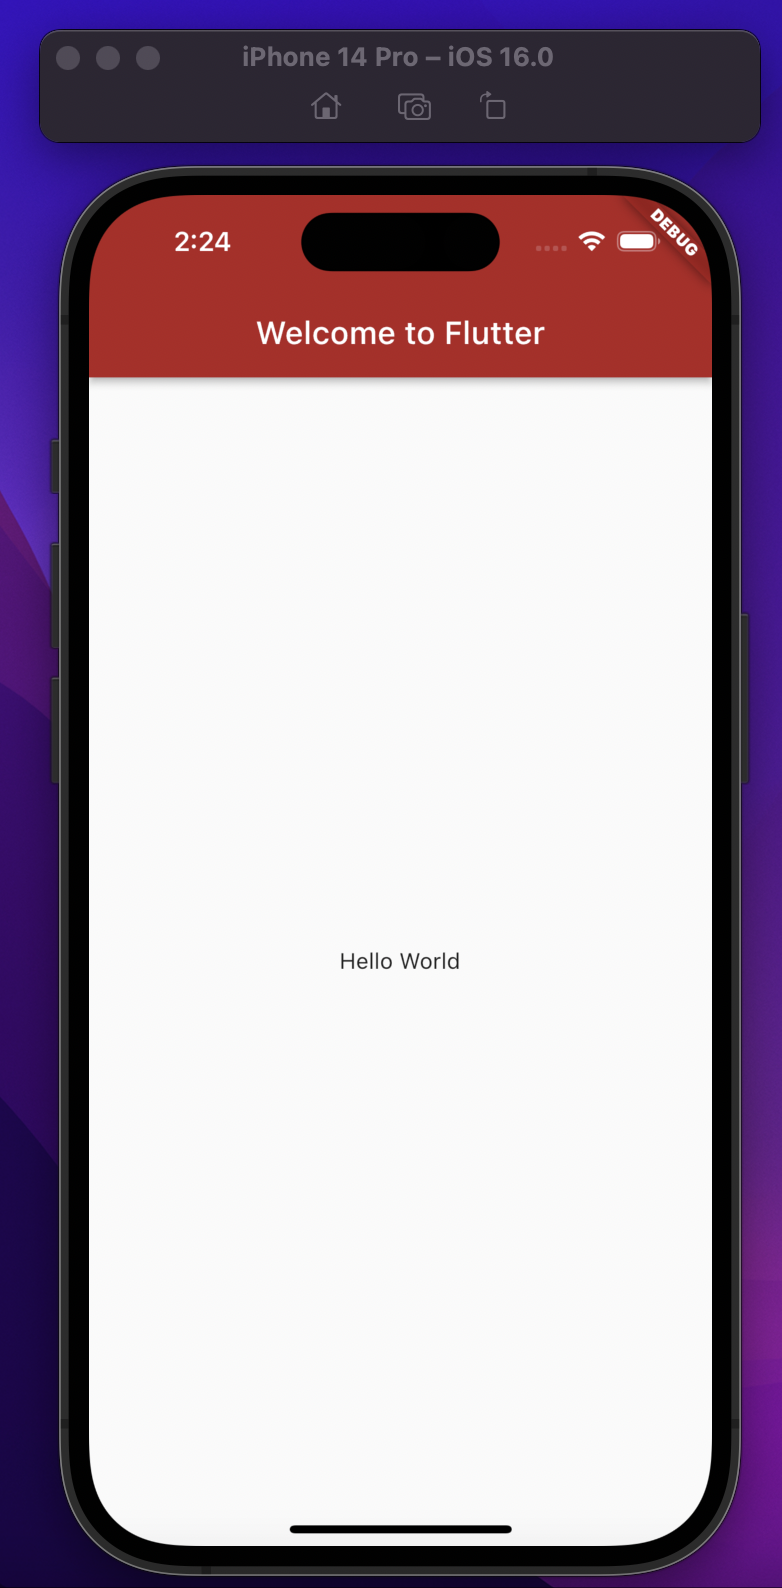
class MyApp extends StatelessWidget {
@override
Widget build(BuildContext ctxt) {
return new MaterialApp(
title: "MySampleApplication",
home: new Scaffold(
appBar: new AppBar(
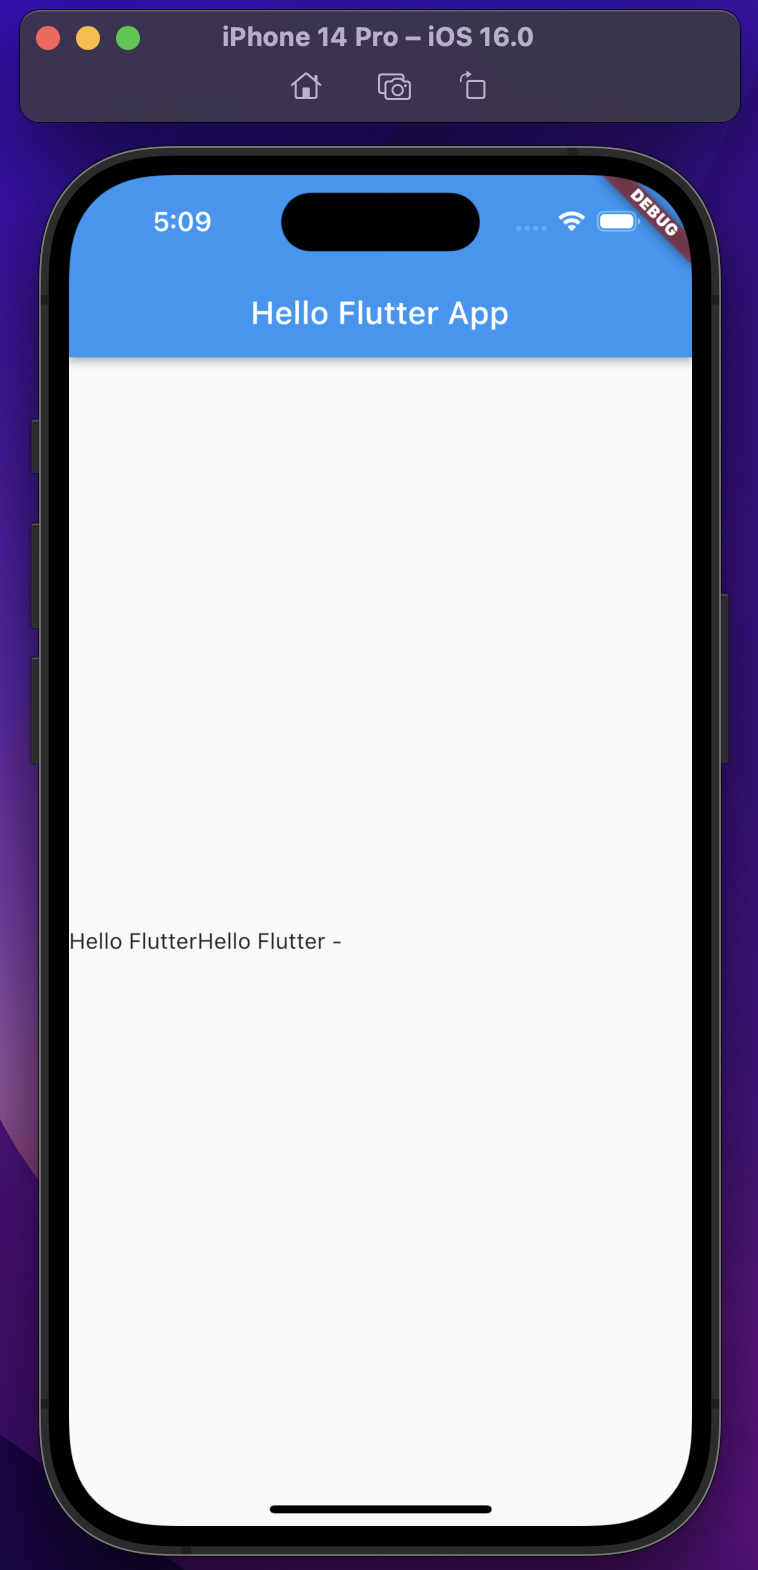
title: new Text("Hello Flutter App"),
),
body: new Center(
child: new Row(
children: <Widget>[
new Text("Hello Flutter"),
new Text("Hello Flutter - "),
],
),
),
)
);
}
}