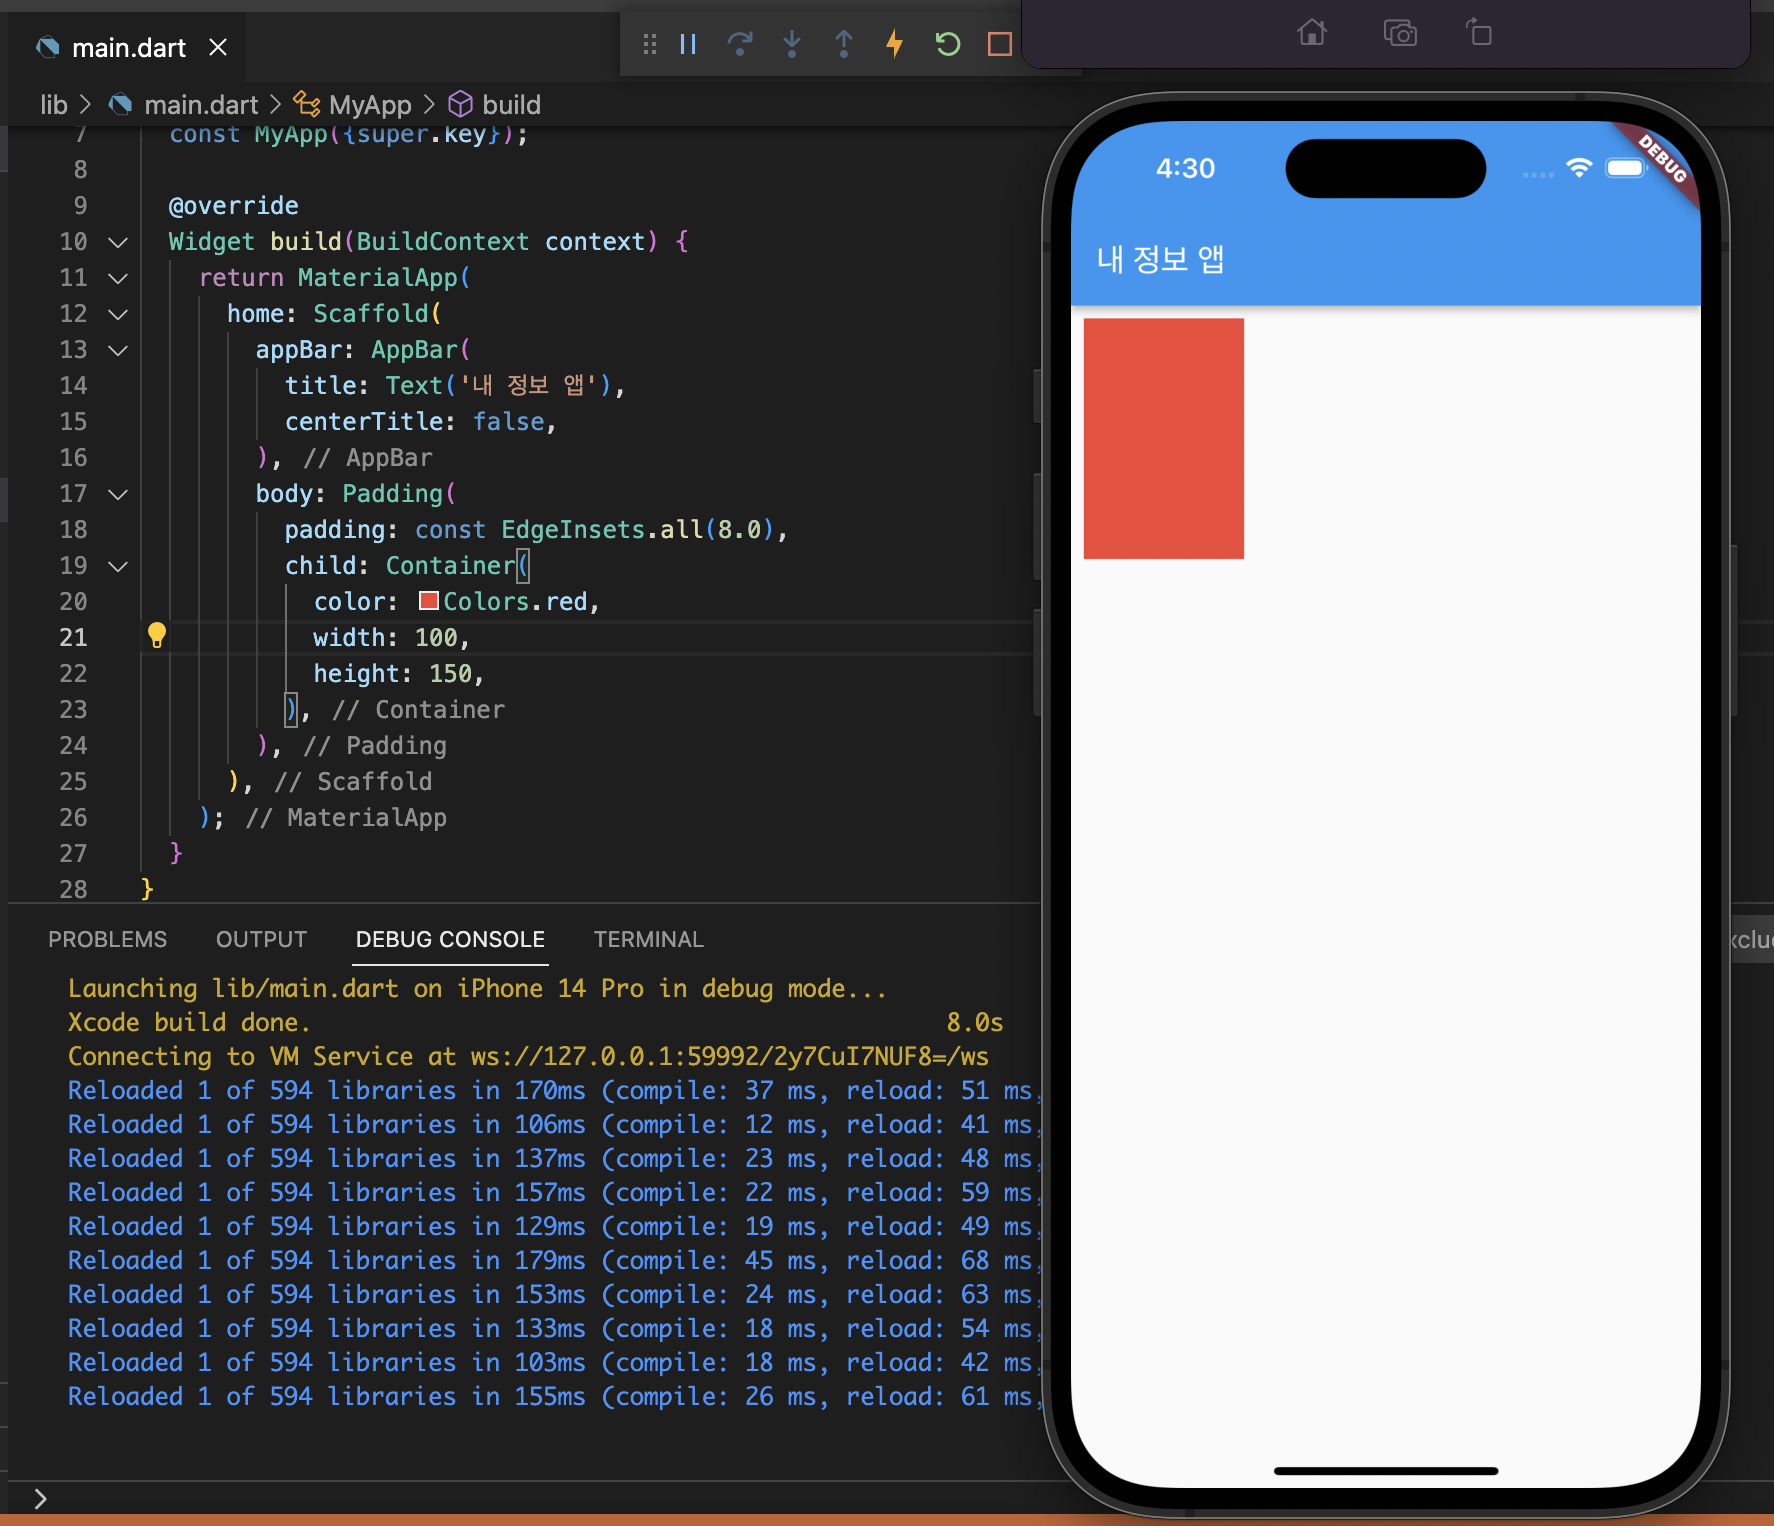
Container 예쁘게 꾸미기
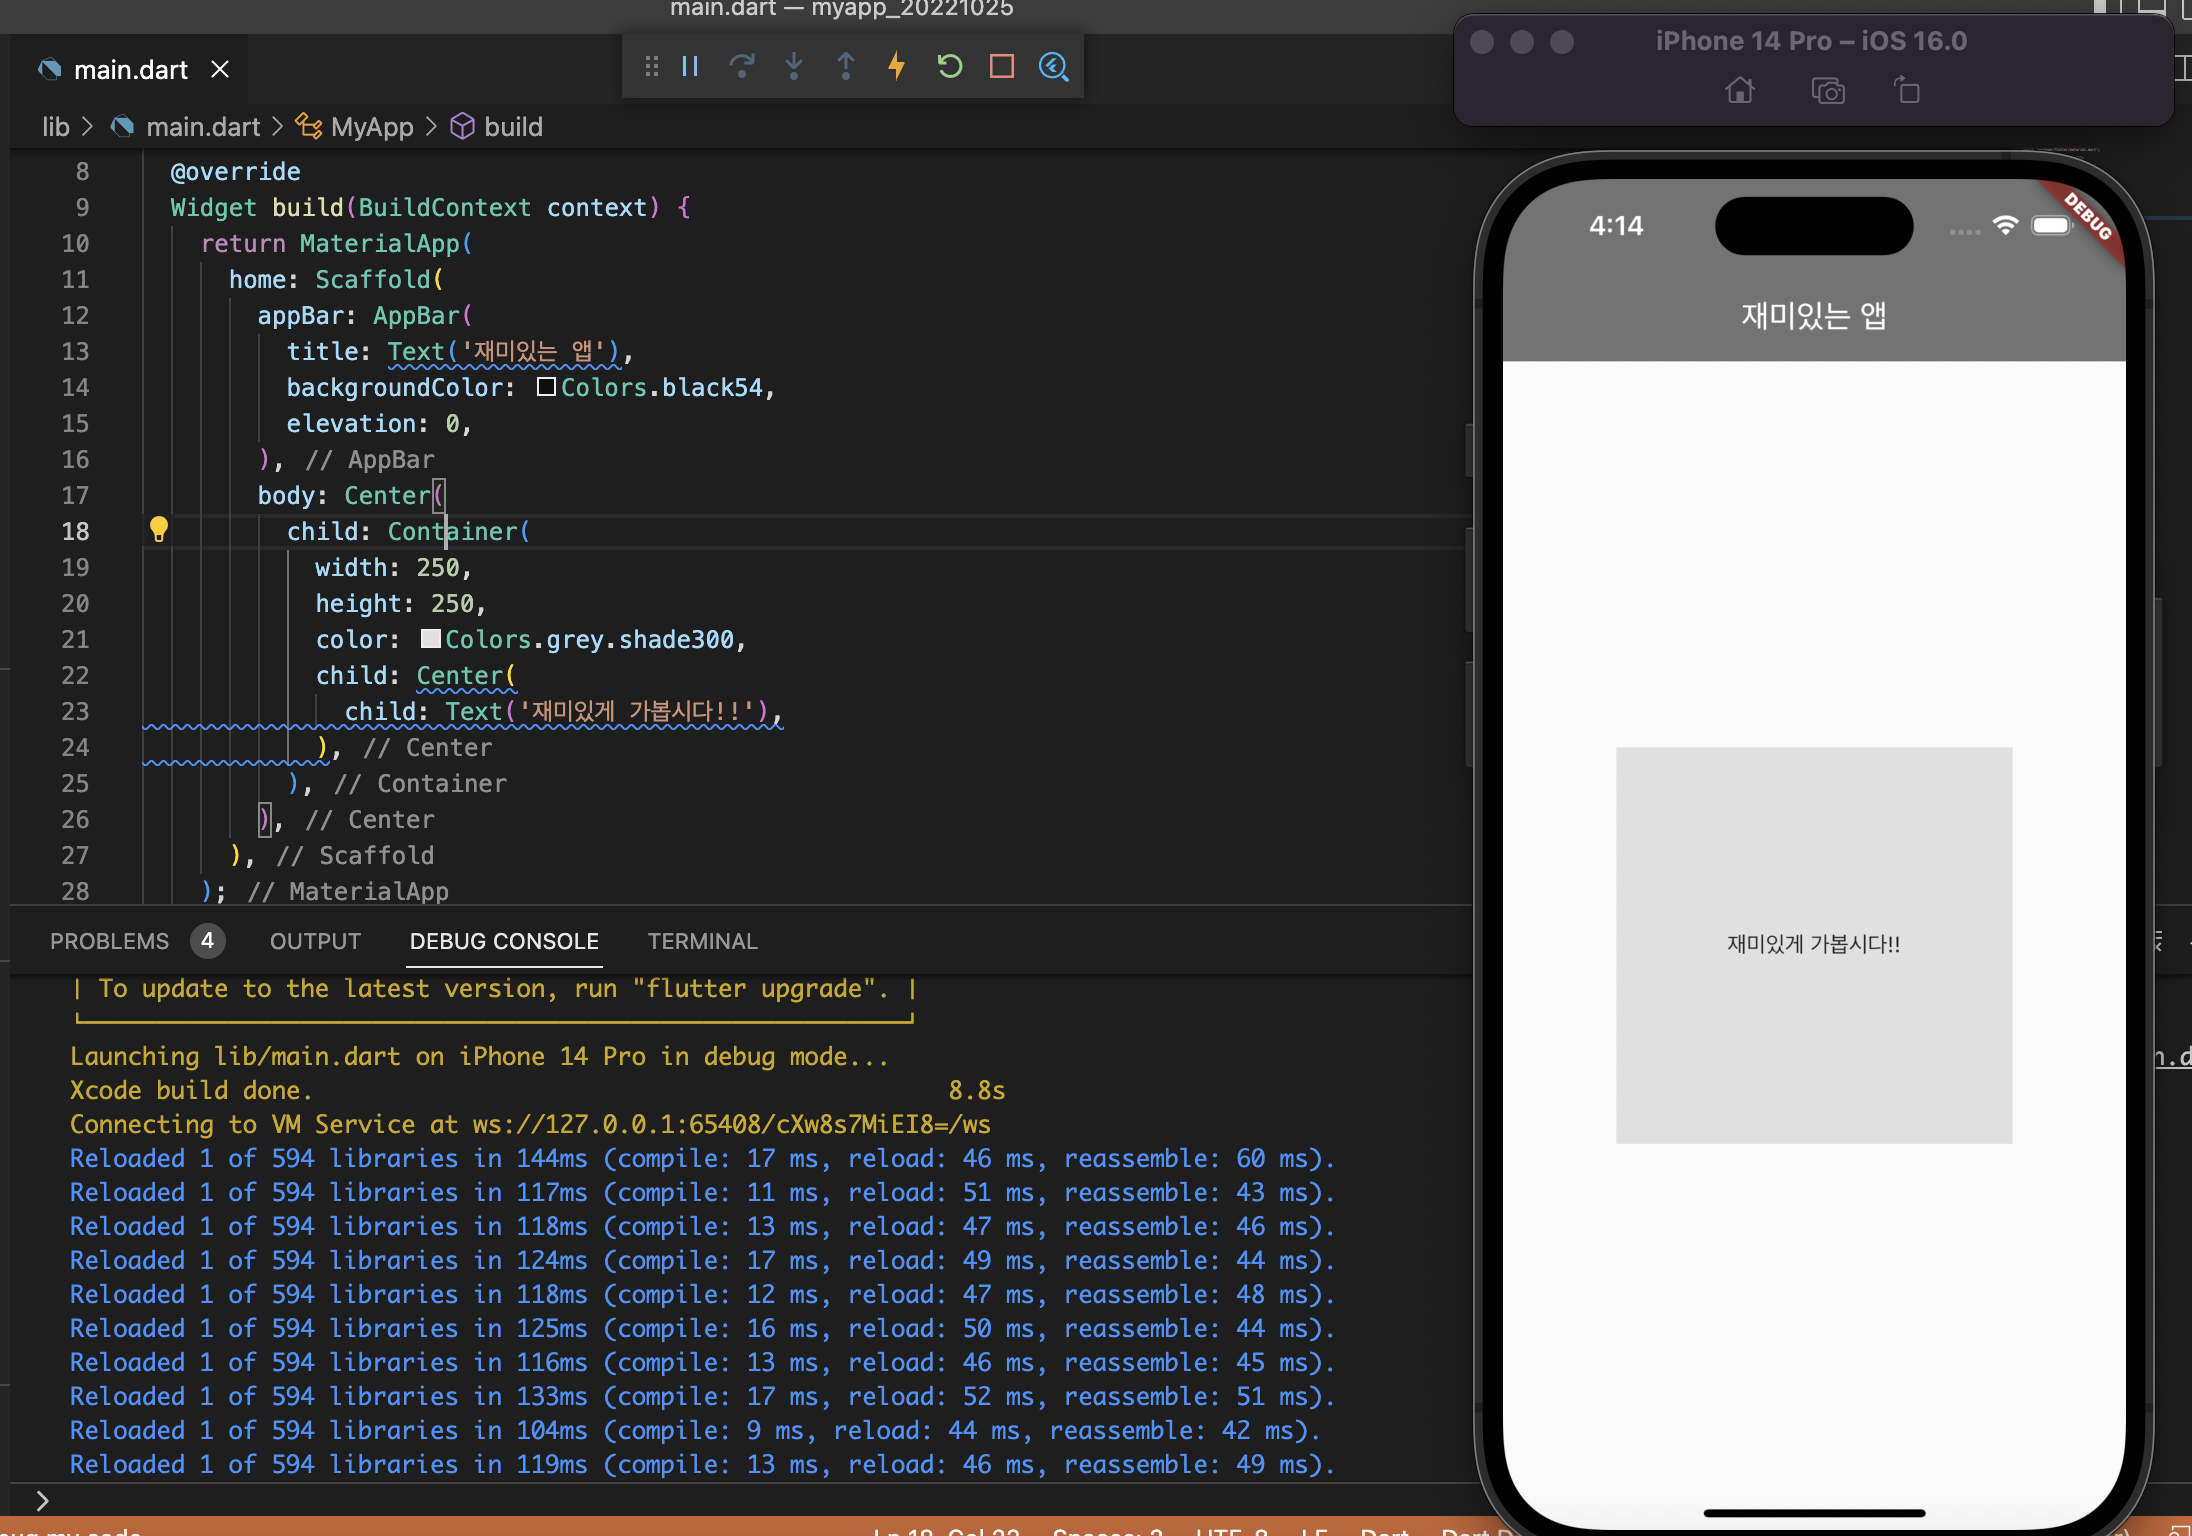
body: Center(
    child: Container(
      width: 250,
      height: 250,
      color: Colors.grey.shade300,
      child: Center(
	      child: Text('재미있게 가봅시다!!'),
      ),
   ),
),
container에 color 속성을 넣어서 컨테이너의 색상을 표현할 수 있습니다.
Container에 decoration 속성이 있다. decoration은 Container 위젯의 스타일을 꾸며줄 때 사용한다. decoration 속성을 사용하기 위해 다음과 같이 입력합니다.

body: Center(
    child: Container(
      width: 250,
      height: 250,
      color: Colors.grey.shade300,
         decoration: BoxDecoration(),
      child: Center(
         child: Text('재미있게 가봅시다!!'),
      ),
   ),
),
decoration을 사용한 이후부터는, color를 반드시 BoxDecoration 안에 넣어야 한다. color 속성을 옮기어 decoration 값 안에 넣는다.

body: Center(
    child: Container(
      width: 250,
      height: 250,
      decoration: BoxDecoration(
         color: Colors.grey.shade300,
      ),
      child: Center(
         child: Text('재미있게 가봅시다!!'),
      ),
   ),
),
그리고, BoxDecoration 안에 디자인 속성을 하나하나씩 넣어주면 된다.
border: 테두리 선 추가
all을 사용하여 전체 면에 테두리 설정 가능

body: Center(
    child: Container(
      width: 250,
      height: 250,
      decoration: BoxDecoration(
           color: Colors.grey.shade300,
           border: Border.all(),
      ),
      child: Center(
           child: Text('재미있게 가봅시다!!'),
      ),
   ),
),
면마다 설정 따로 가능
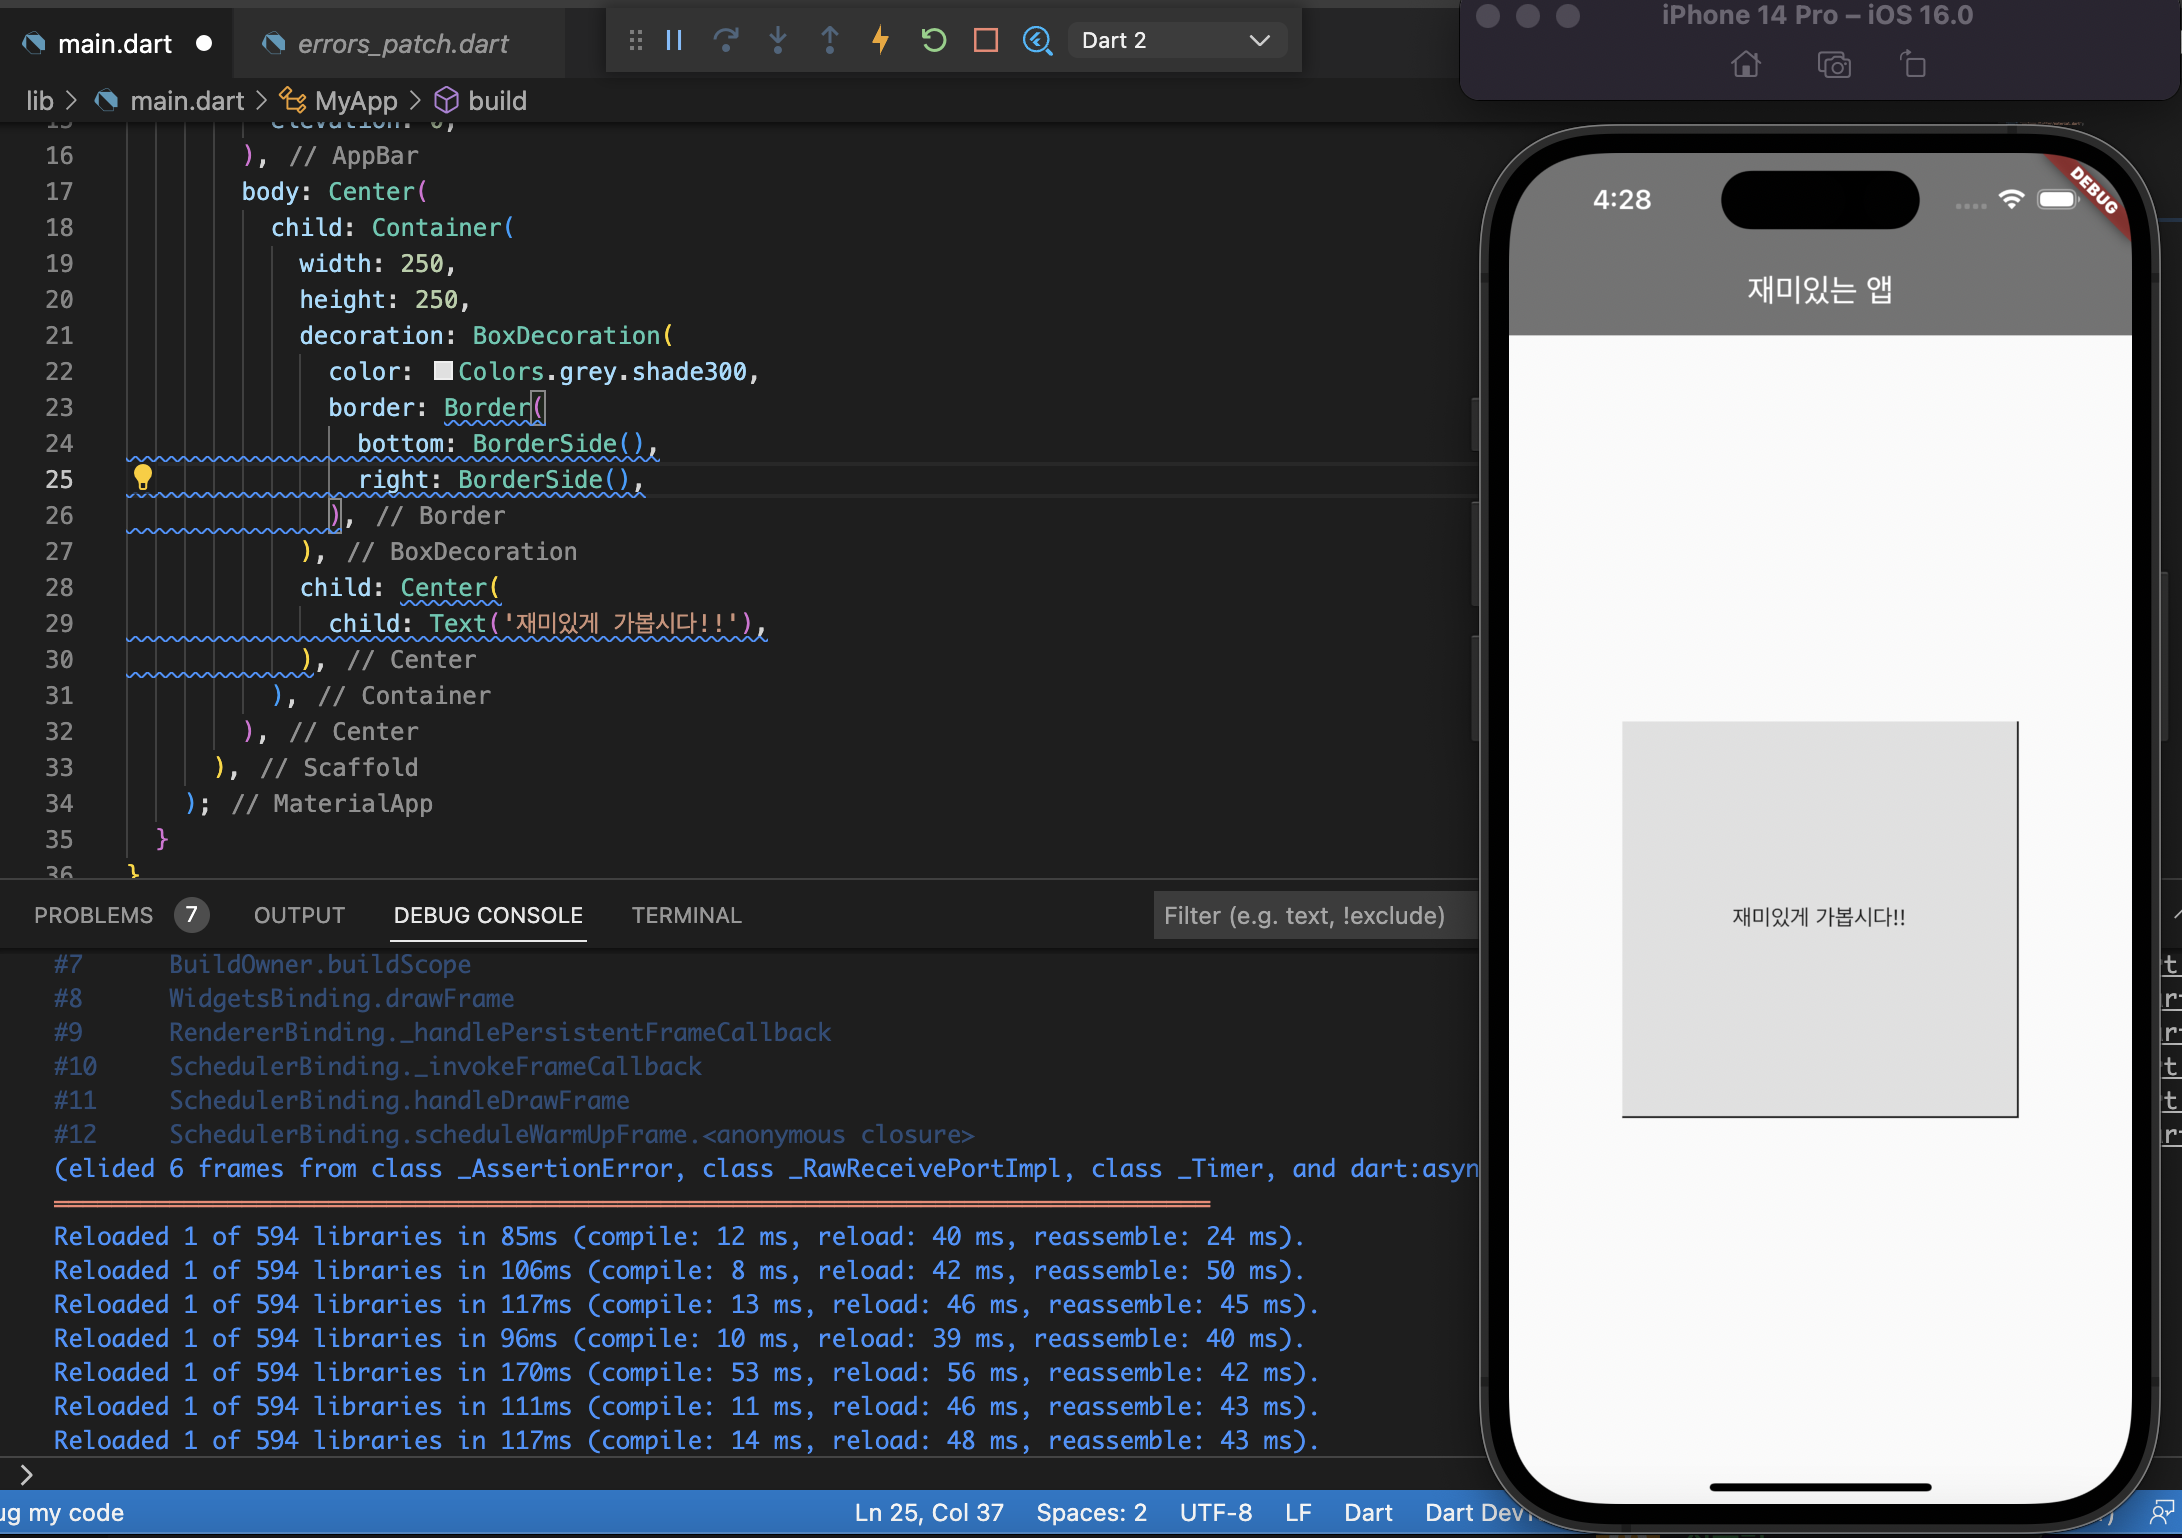
body: Center(
    child: Container(
      width: 250,
      height: 250,
      decoration: BoxDecoration(
           color: Colors.grey.shade300,
           border: Border(
              bottom: BorderSide(),
              right: BorderSide(),
           ),
      ),
      child: Center(
          child: Text('재미있게 가봅시다!!'),
      ),
   ),
),
borderRadius: 가장자리 둥글게

body: Center(
    child: Container(
      width: 250,
      height: 250,
      decoration: BoxDecoration(
          color: Colors.grey.shade300,
          borderRadius: BorderRadius.circular(30),
      ),
      child: Center(
          child: Text('재미있게 가봅시다!!'),
      ),
   ),
),
일반적으로 circular (둥글게), only 가 제일 많이 사용됨
gradient: 색상 그레디언트 넣기
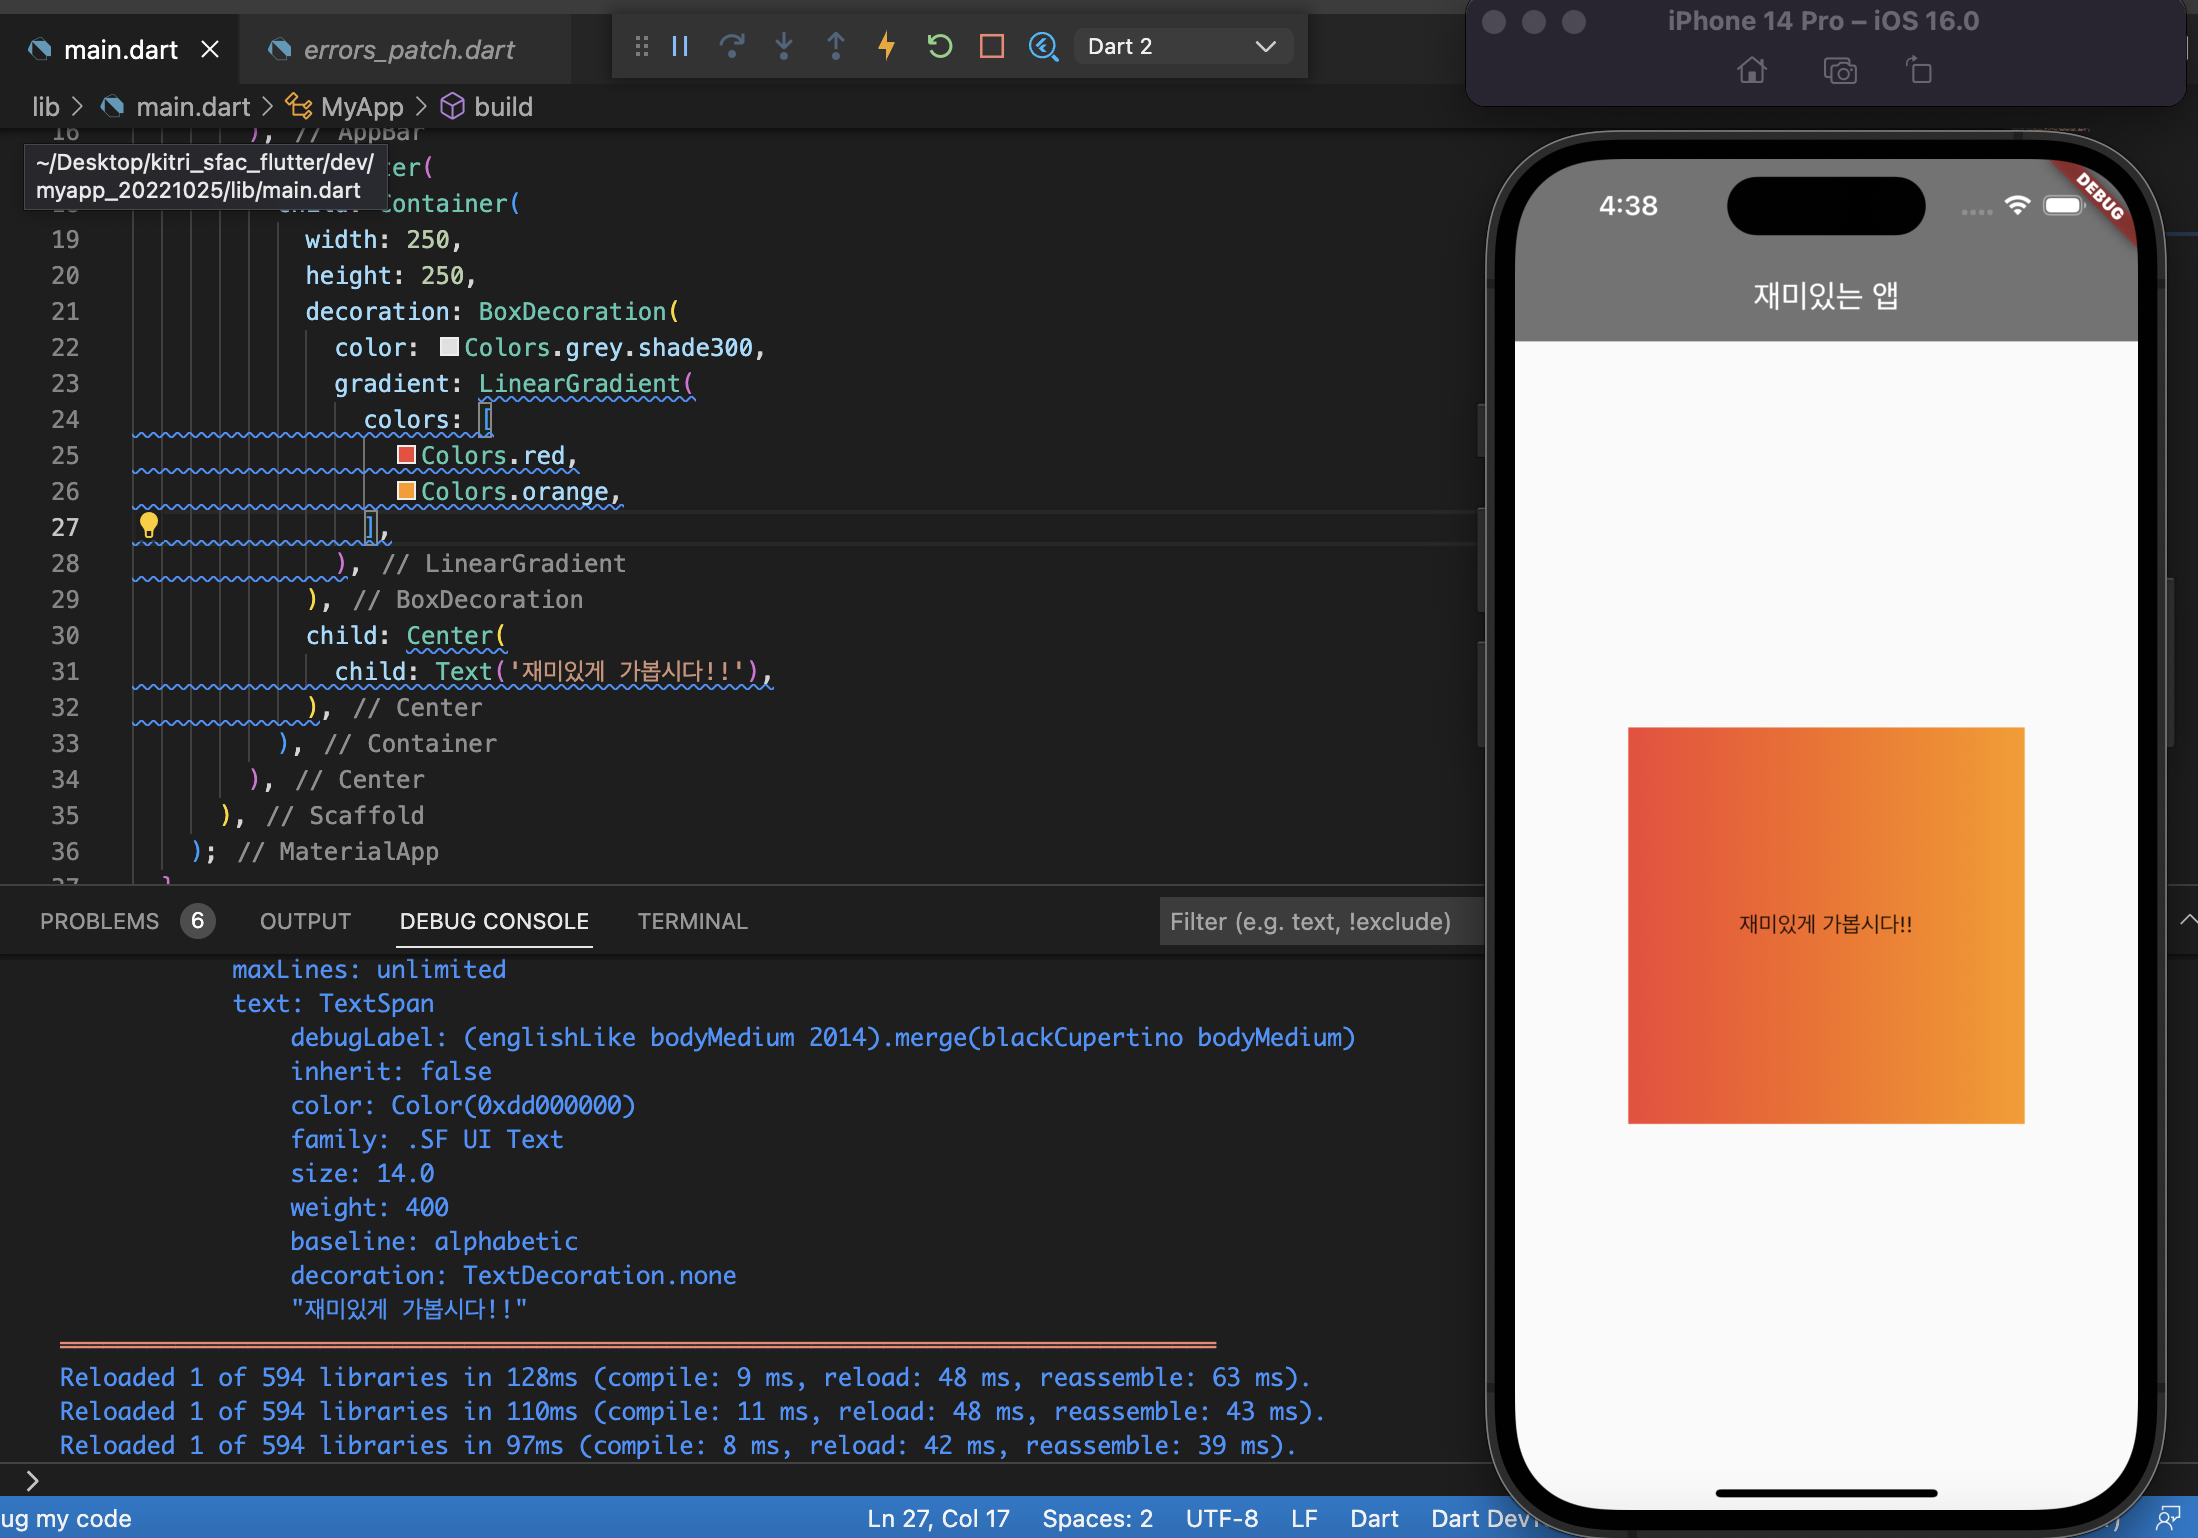
body: Center(
    child: Container(
      width: 250,
      height: 250,
      decoration: BoxDecoration(
          color: Colors.grey.shade300,
          gradient: LinearGradient(
              colors: [
                  Colors.red,
                  Colors.orange,
              ],
          ),
      ),
      child: Center(
          child: Text('재미있게 가봅시다!!'),
      ),
   ),
),
shadow: 그림자 넣기

body: Center(
    child: Container(
      width: 250,
      height: 250,
      decoration: BoxDecoration(
         color: Colors.grey.shade300,
         boxShadow: [
            BoxShadow(
              color: Colors.black26,
              spreadRadius: 4,
              blurRadius: 8,
            ),
         ],
      ),
      child: Center(
         child: Text('재미있게 가봅시다!!'),
      ),
   ),
),
clipBehavior
clipBehavior
container의 기본 clip behavior를 생각하자. 자식은, 부모의 상황을 전부 알지 못한다. 특히, 부모의 모양을 모르기 때문에, Container의 모양에 맞게 범위에 벗어날 경우를 대비하여 자식이 범위 밖을 지나면 자동으로 잘라주는 clipBehavior를 설정할 수 있다.

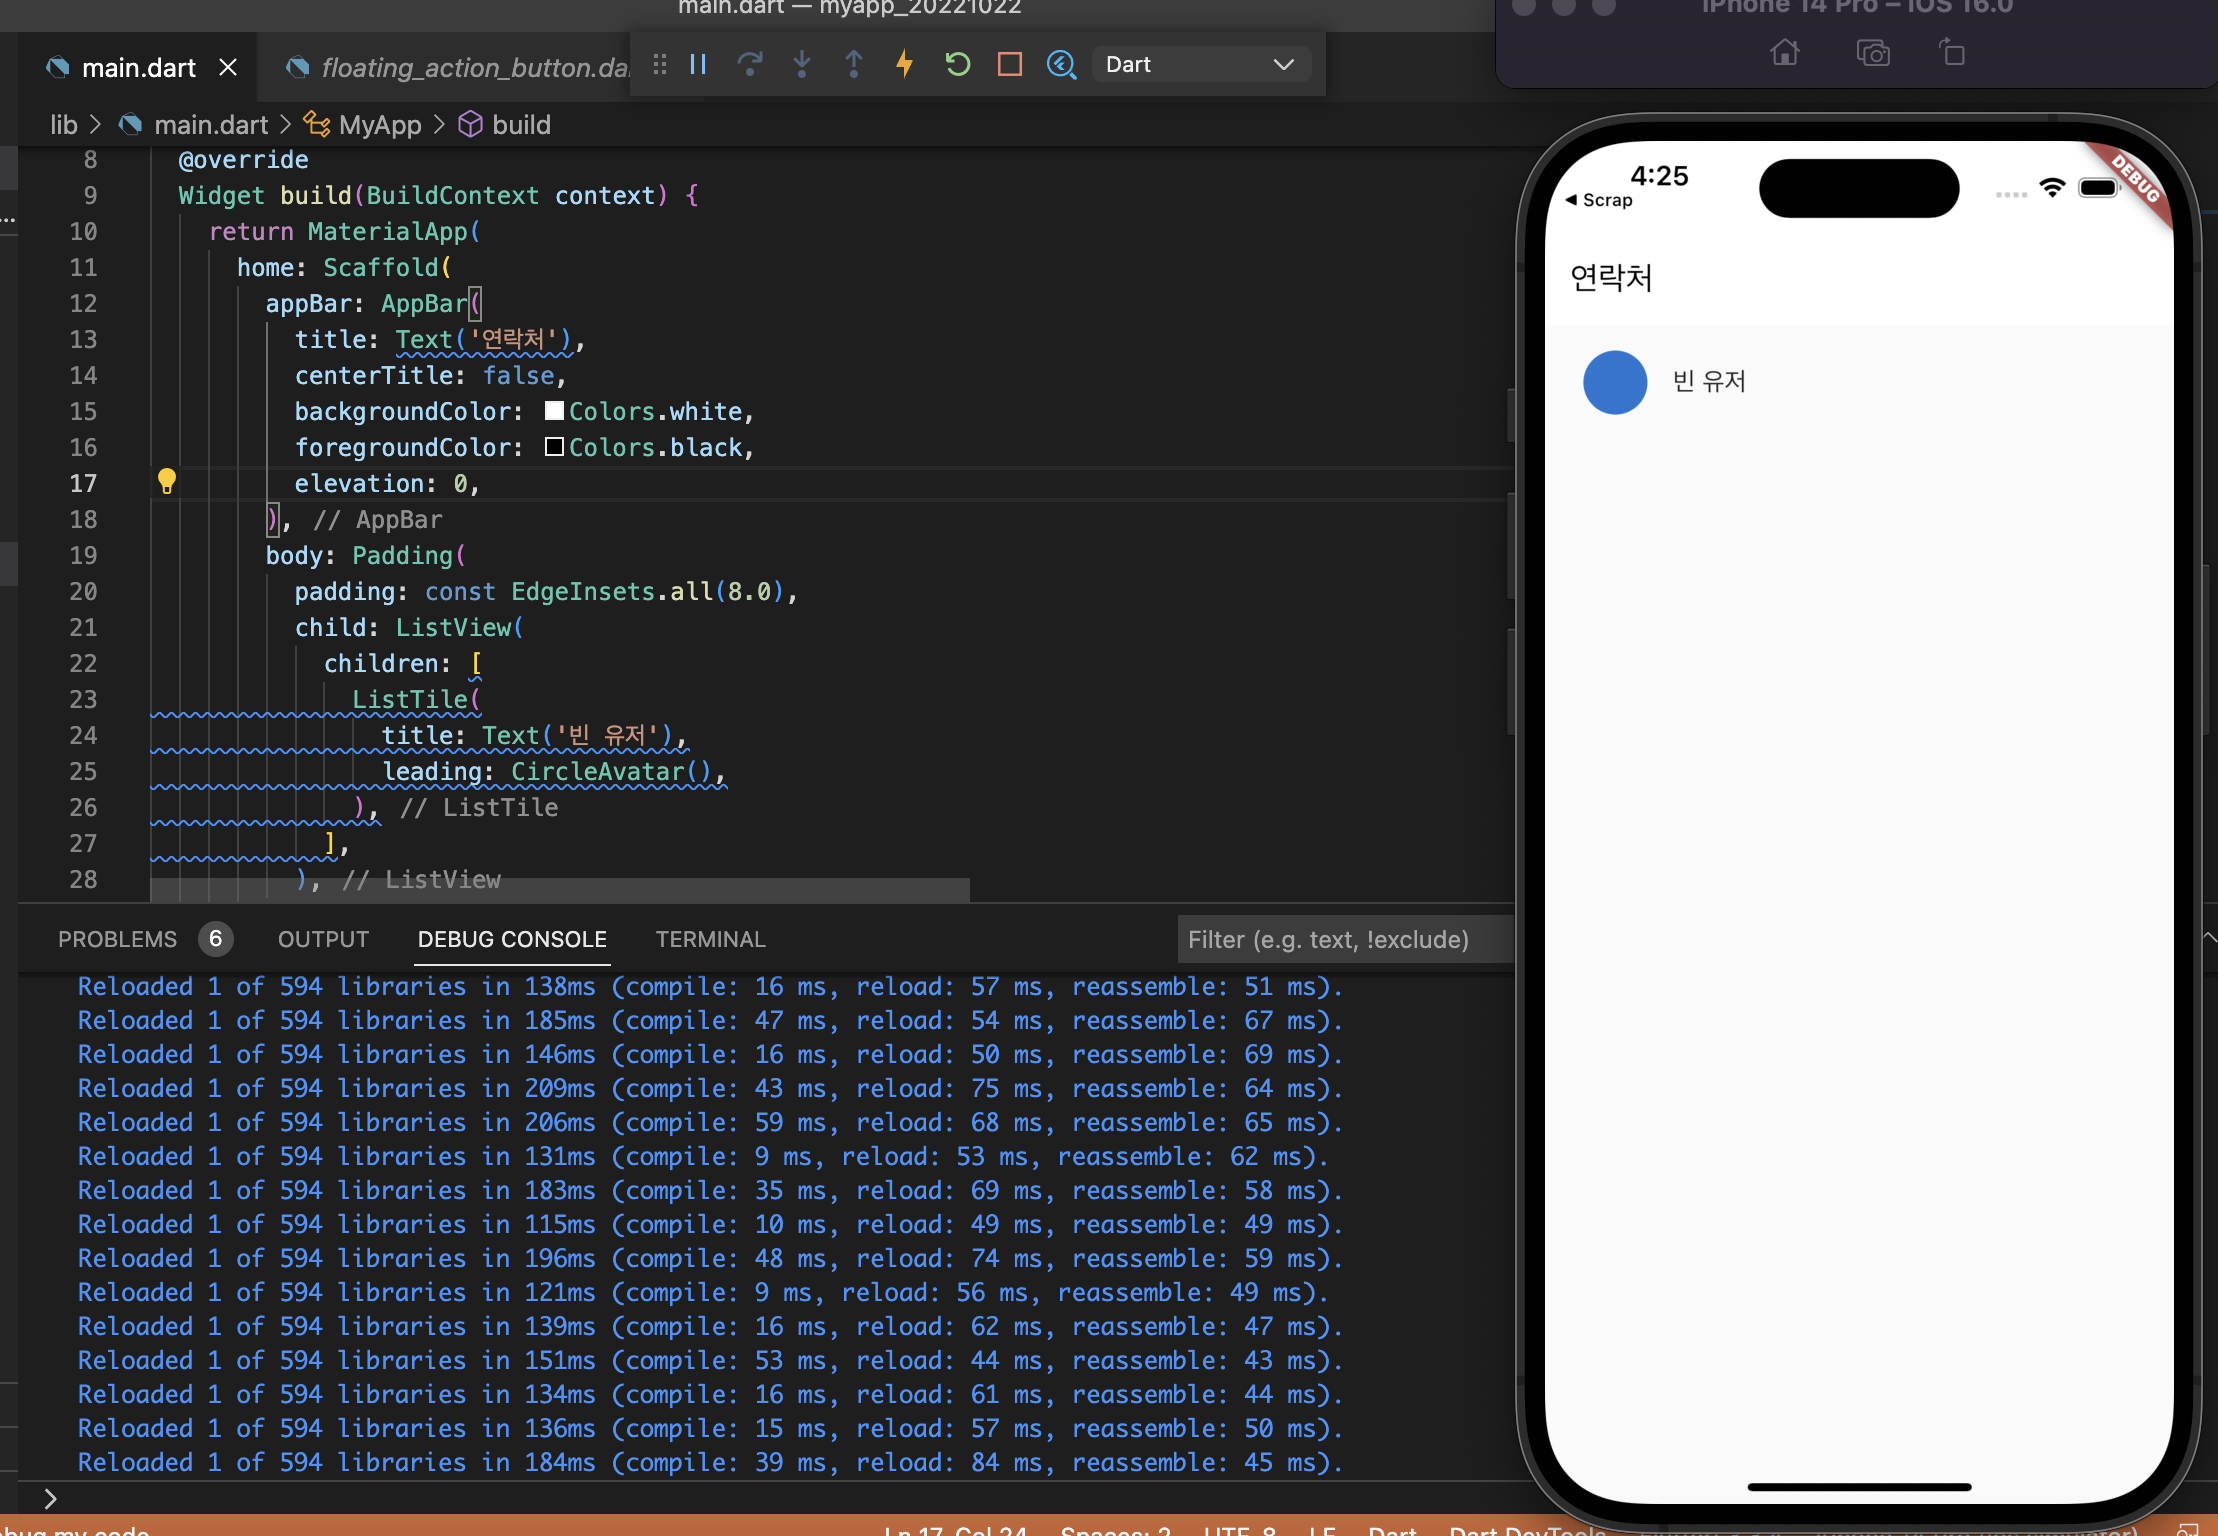
ListView 더 알기
우리에게 스크롤 기능을 주는 ListView는 수직으로만 사용했는데, 우리가 주는 속성 값에 따라 수평으로도 사용이 가능하다. 기본값의 스크롤 방향이 수직으로 설정돼있던 것이다.
중심, 회전축의 뜻을 가지고 있는 Axis, ListView에는 scrollDirection 속성을 설정할 수 있는데, 요구되는 데이터 타입이 Axis이다.
ListView의 속성 중 scrollDirection의 기본값은 Axis.vertical 이기 때문에 수직 스크롤이 되는 것이다.

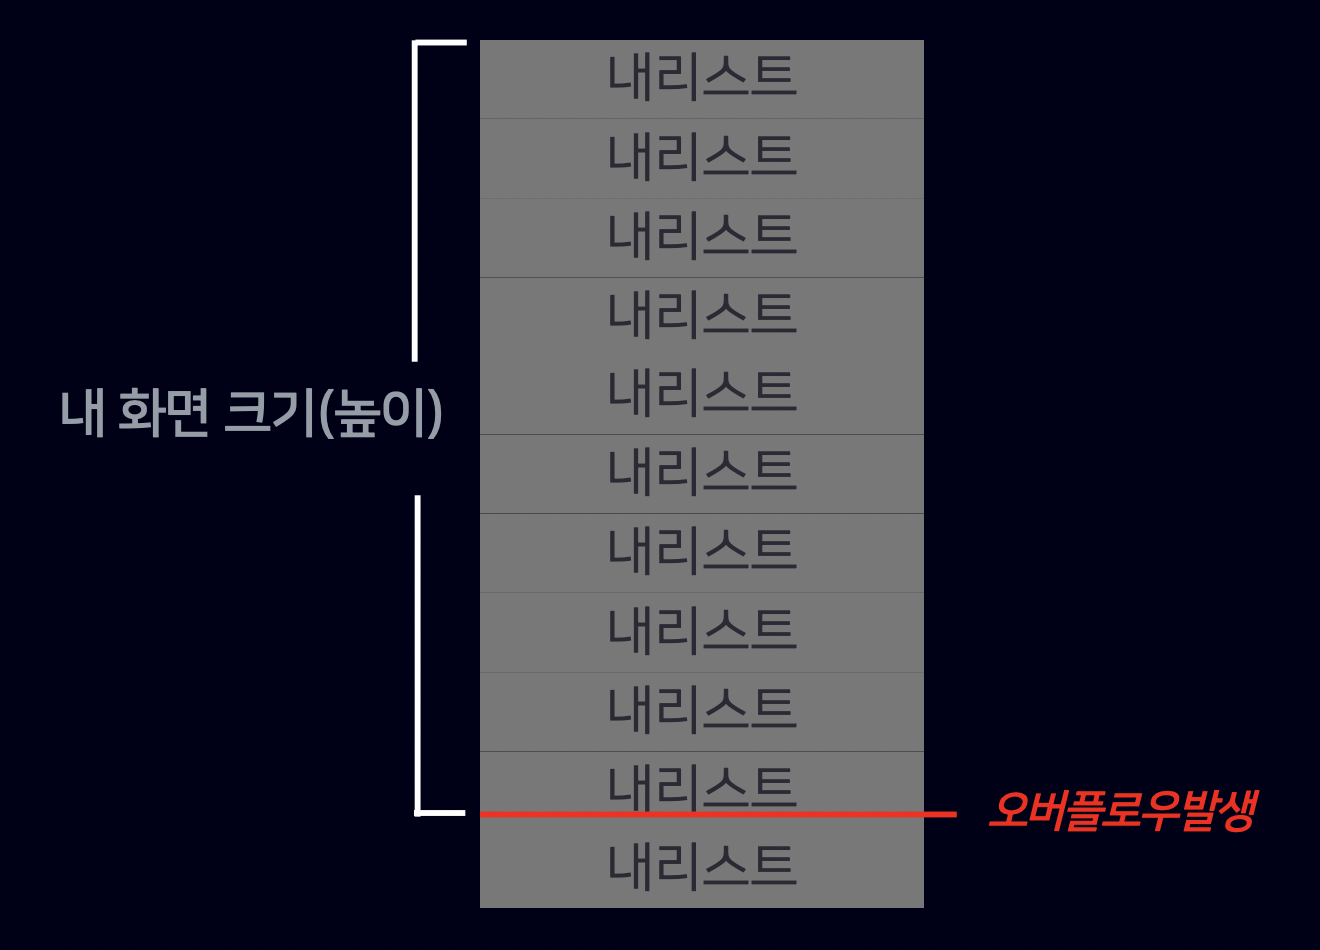
Q. 그러면, Axis.vertical만 Axis.horizontal로 바꿔주면 되는 것 아닌가요?
맞지만, 하나 더 해줘야 할 것이 있습니다. ListView의 특성상, 부모 위젯의 영향을 받기 때문에, 부모를 하나 만들어 사이즈를 정해주어야 합니다. ListView를 Axis.horizontal을 하게 되면, 높이가 무제한이 되기 때문에 사이즈 부모를 꼭 넣어줘야 합니다.

body: SizedBox(
   height: 200,
   child: ListView(
       scrollDirection: Axis.horizontal,
       children: [
           Container(
              width: 1000,
              height: 3,
              decoration: BoxDecoration(
                  gradient: LinearGradient(
                      colors: [
                         Colors.red,
                         Colors.blue,
                      ],
                  ),
              ),
           ),
       ],
   ),
),
오늘의 실습

// ignore_for_file: prefer_const_constructors, sized_box_for_whitespace, unused_local_variable
// ignore_for_file: prefer_const_literals_to_create_immutables
import 'package:flutter/material.dart';
void main() => runApp(MyApp());
class MyApp extends StatelessWidget {
const MyApp({super.key});
@override
Widget build(BuildContext context) {
return MaterialApp(
theme: ThemeData.dark(),
home: Scaffold(
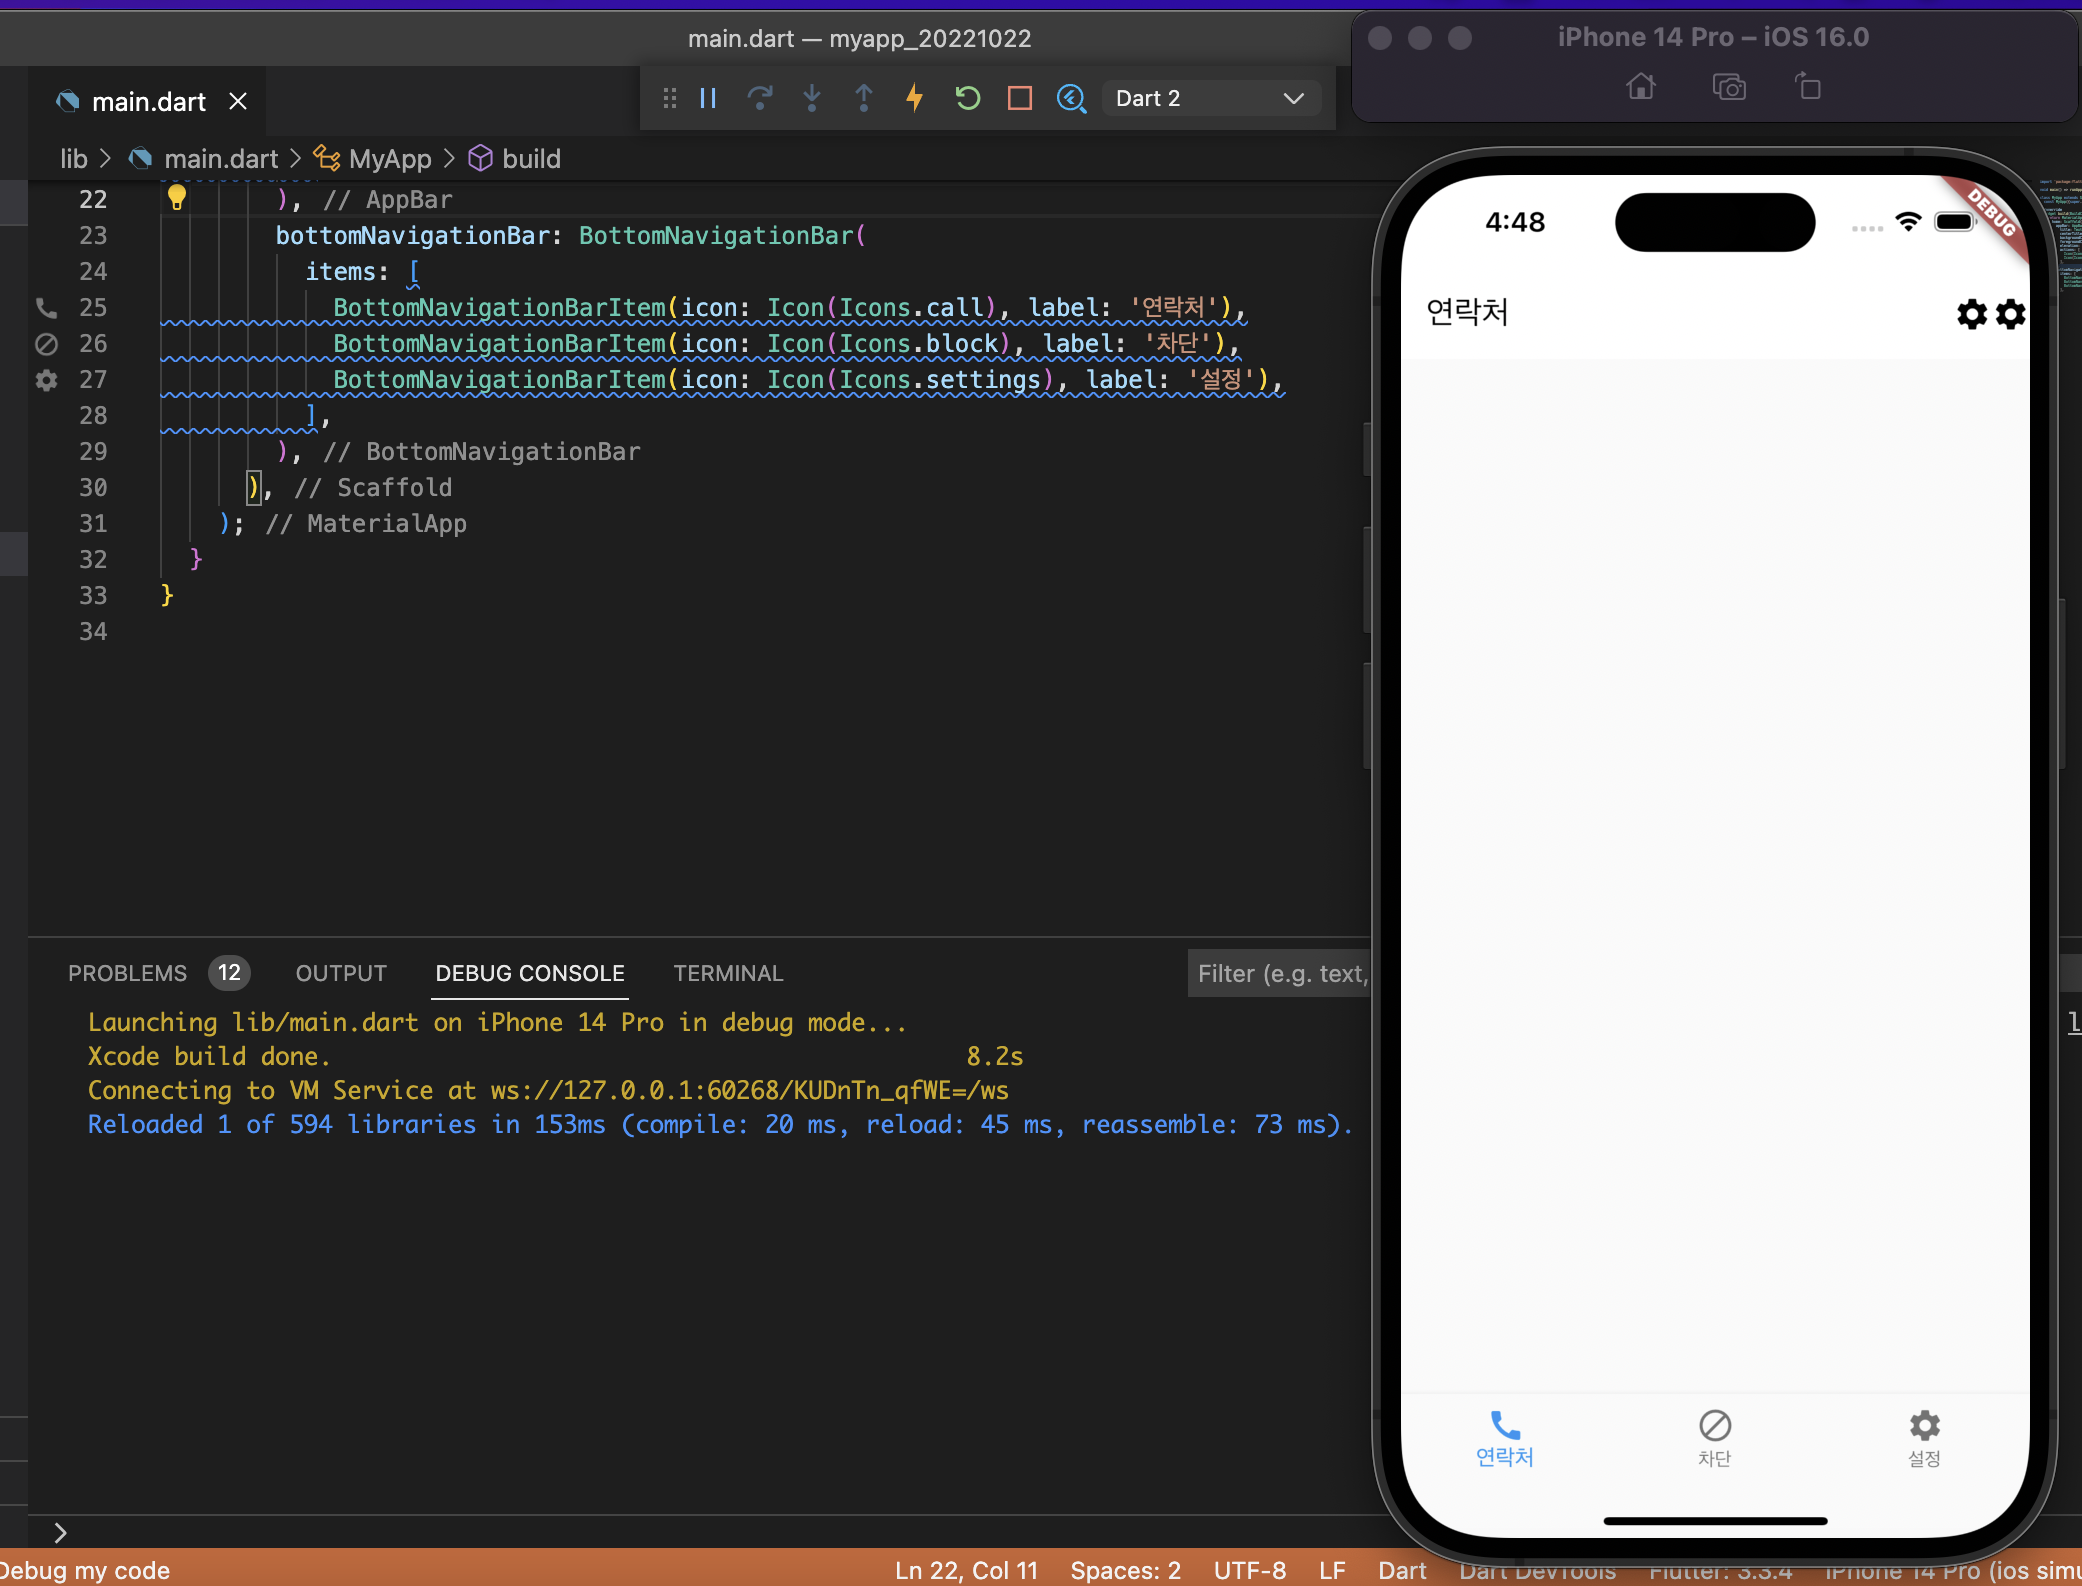
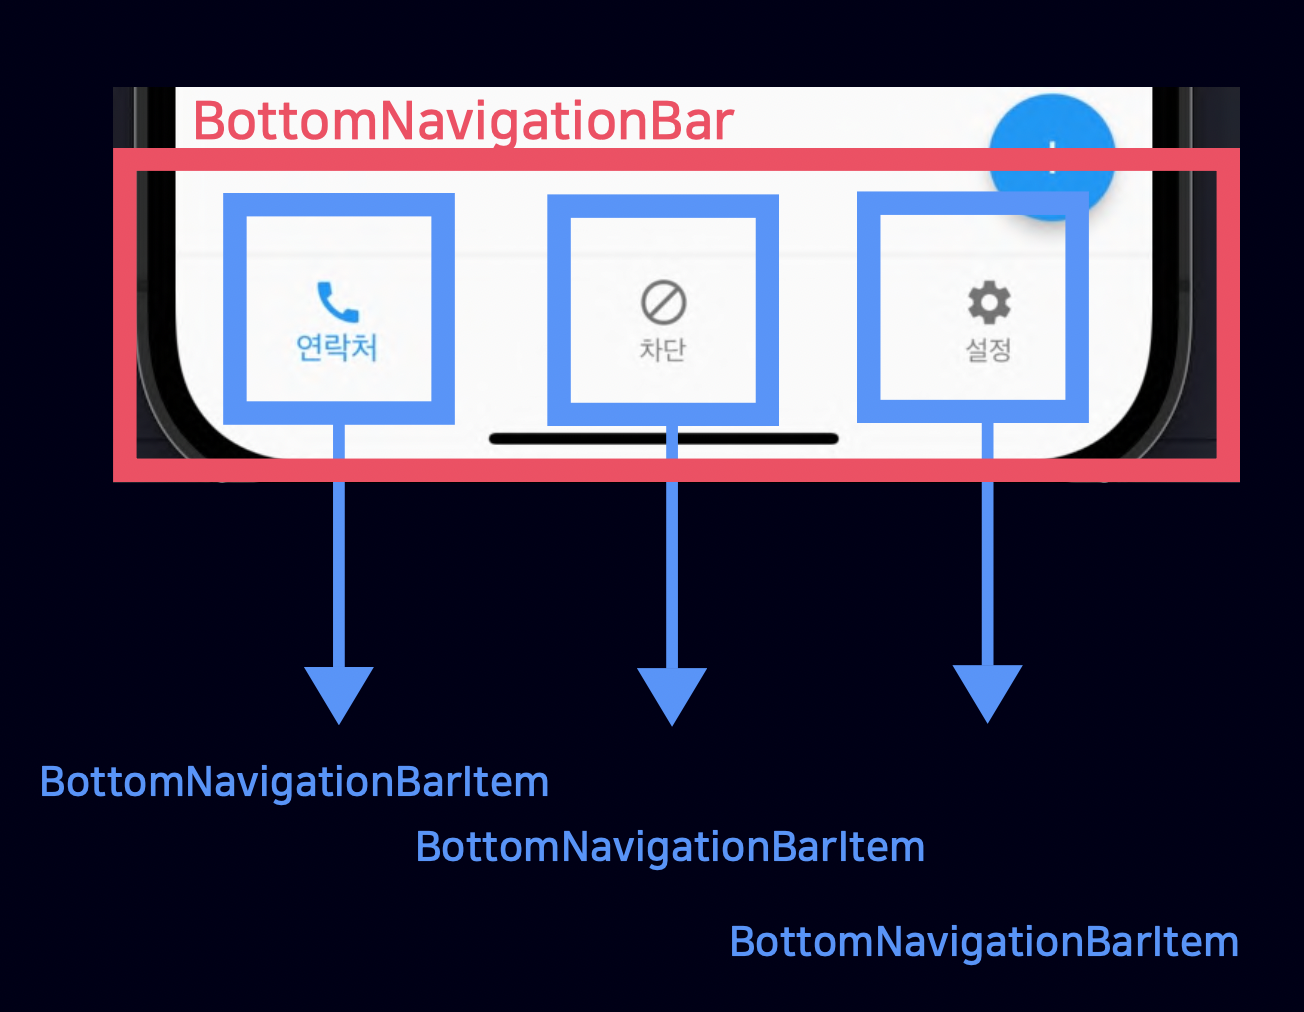
bottomNavigationBar: BottomNavigationBar(
type: BottomNavigationBarType.fixed,
items: [
BottomNavigationBarItem(
icon: Icon(Icons.laptop_chromebook_sharp), label: '강의'),
BottomNavigationBarItem(
icon: Icon(Icons.favorite),
label: '즐겨찾기',
),
BottomNavigationBarItem(
icon: Icon(Icons.search),
label: '검색',
),
BottomNavigationBarItem(
icon: Icon(Icons.comment_rounded),
label: '커뮤니티',
),
BottomNavigationBarItem(
icon: Icon(Icons.person),
label: '나의 정보',
),
],
),
appBar: AppBar(
centerTitle: true,
elevation: 0,
title: Text('스나이퍼팩토리앱'),
),
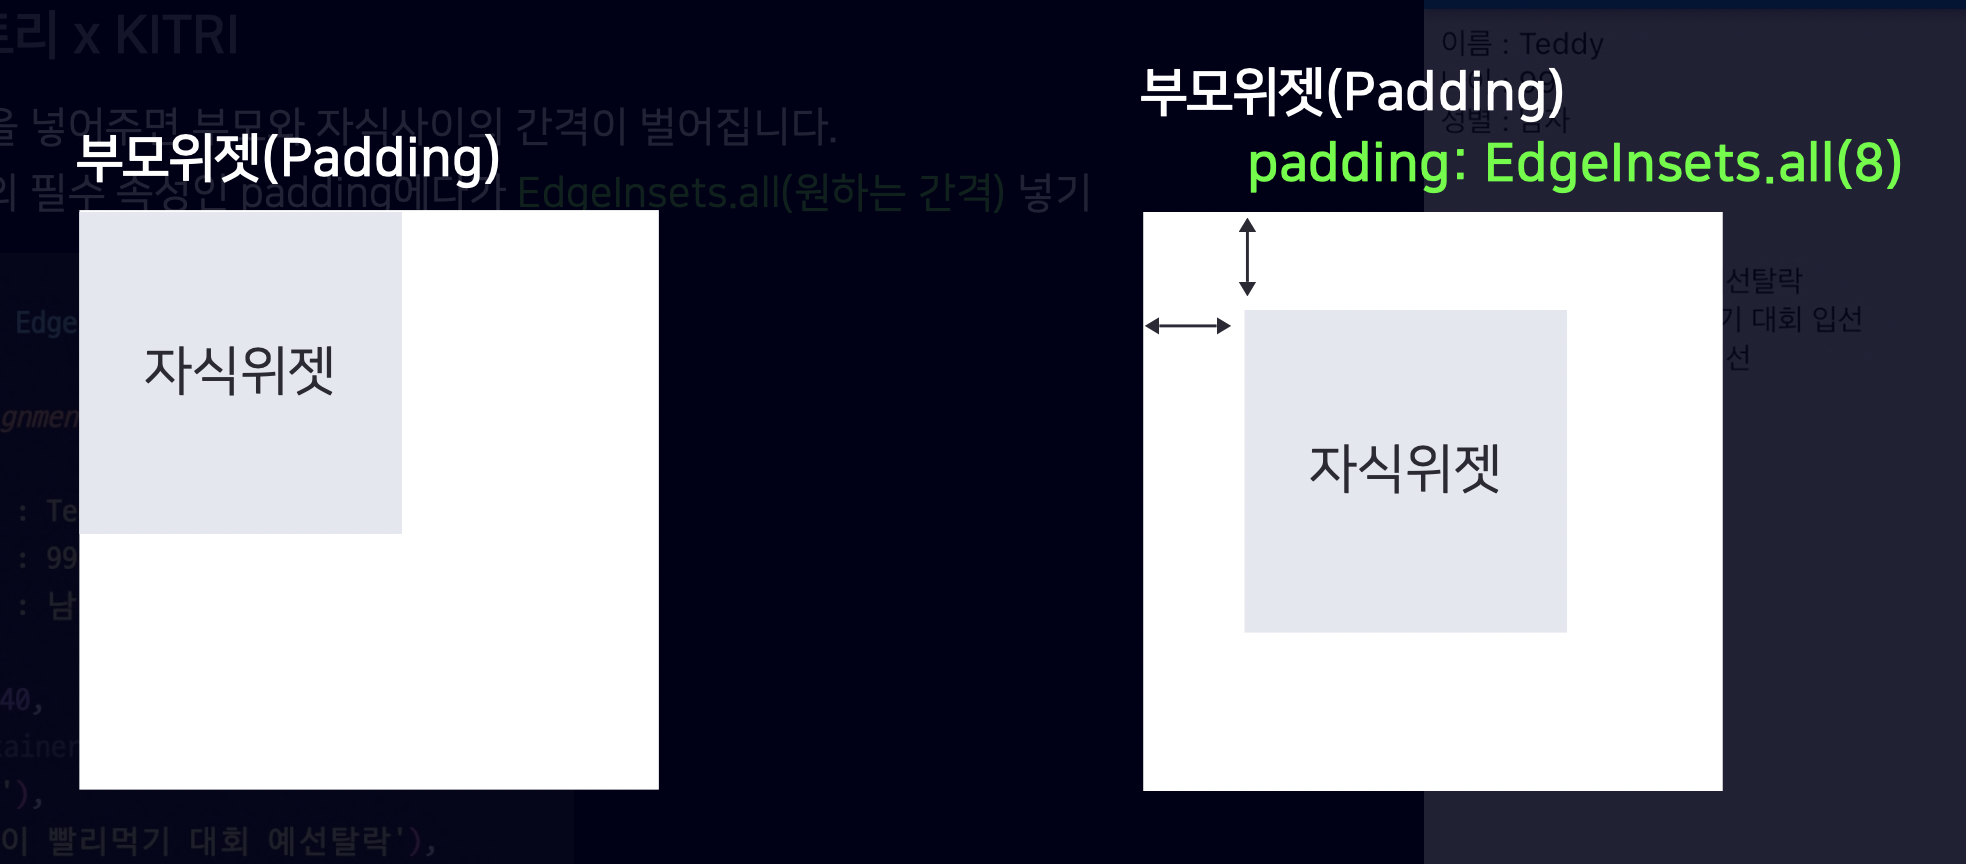
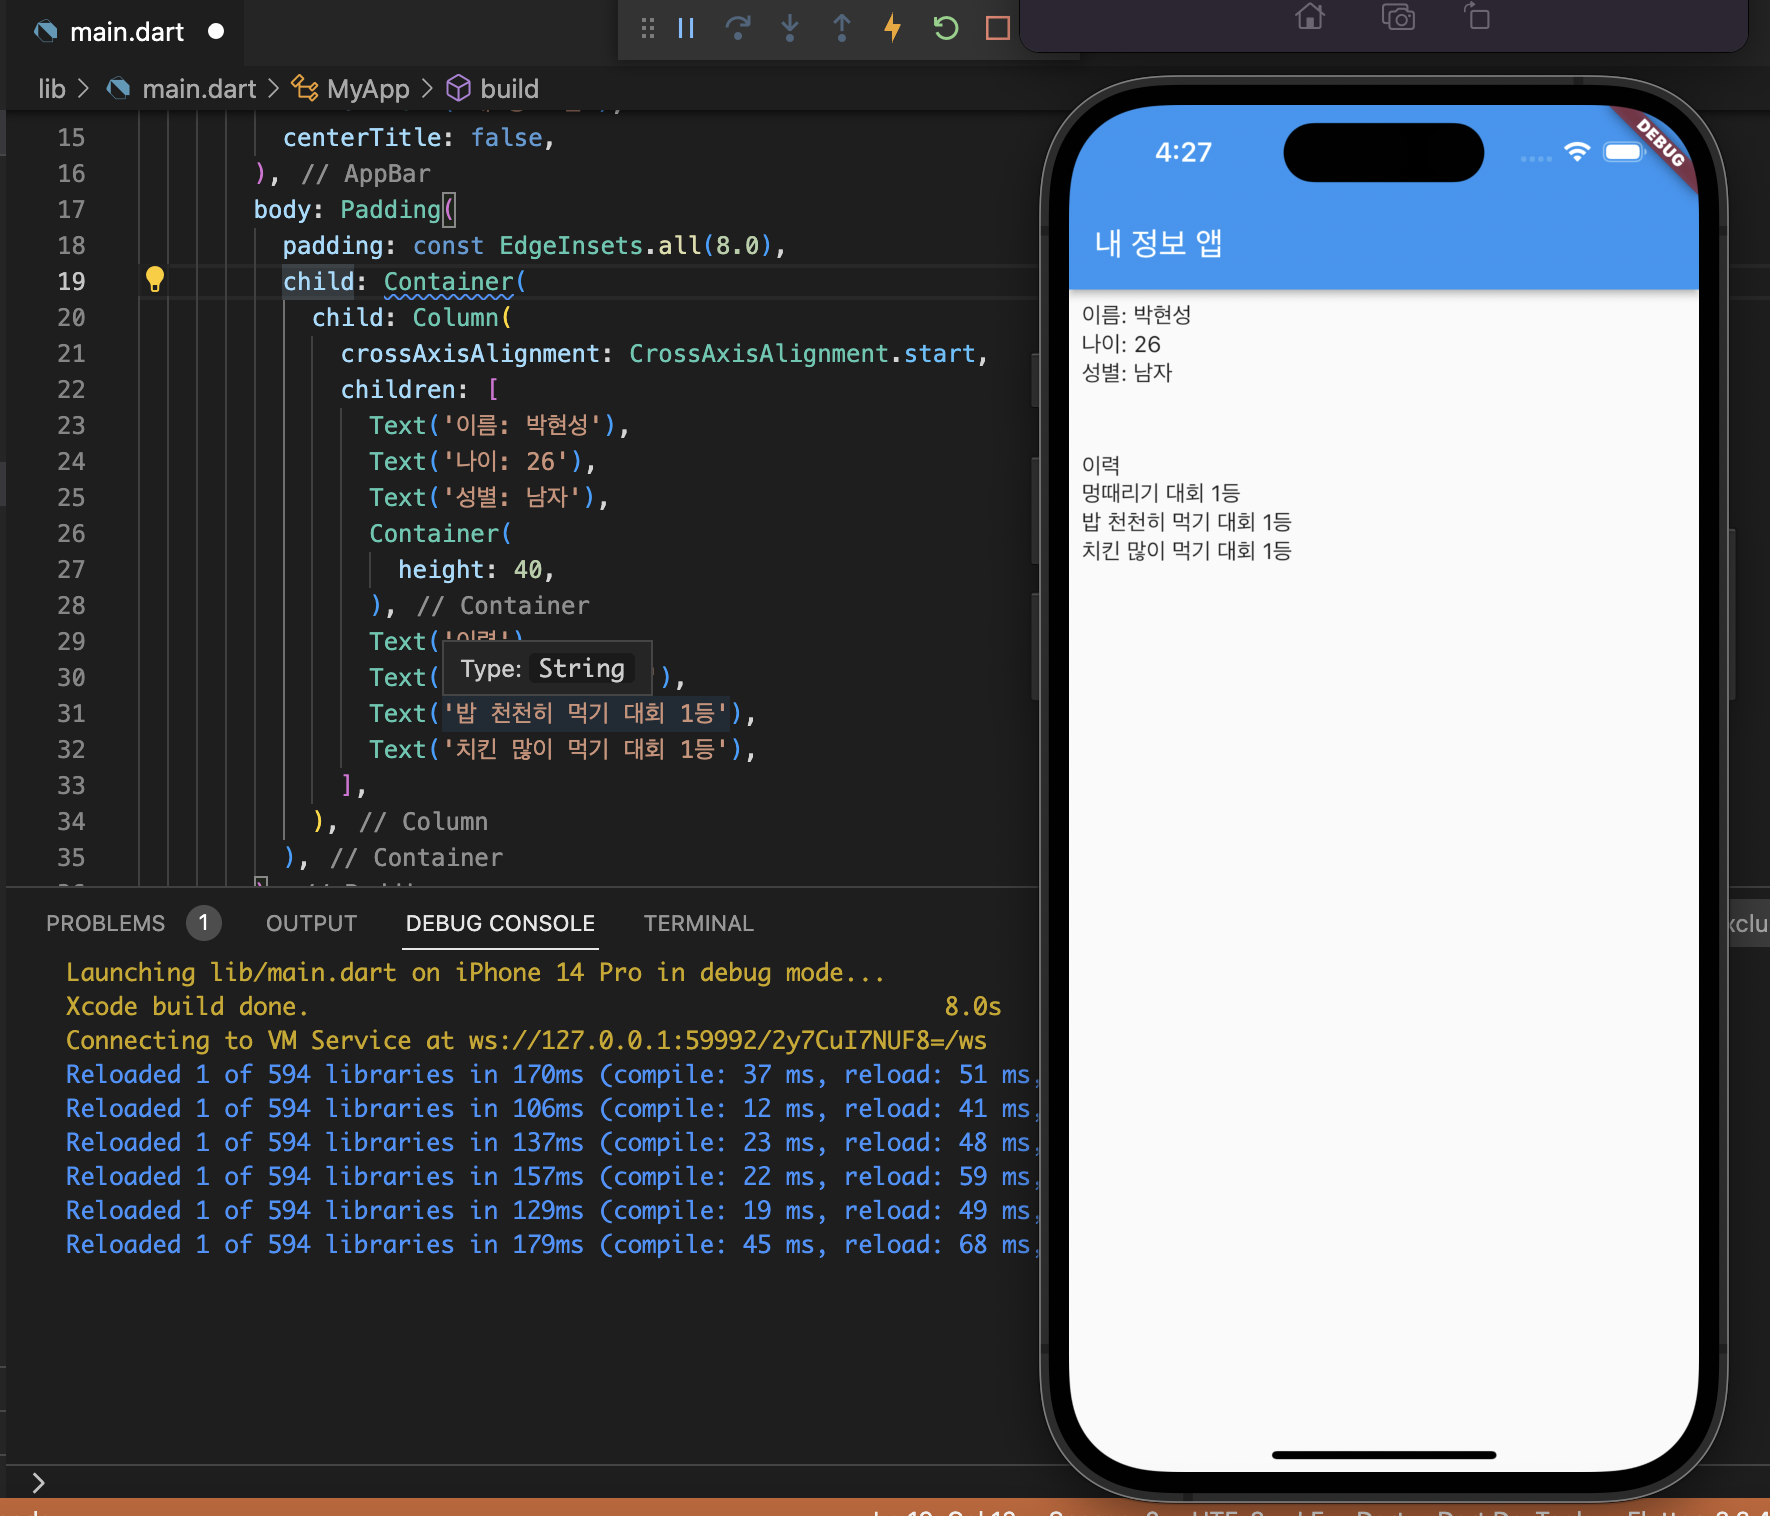
body: Padding(
padding: const EdgeInsets.all(8.0),
child: ListView(
children: [
Container(
decoration: BoxDecoration(
borderRadius: BorderRadius.circular(16),
),
child: ListTile(
contentPadding:
const EdgeInsets.symmetric(vertical: 8, horizontal: 16),
leading: CircleAvatar(
radius: 24,
backgroundImage: NetworkImage('<https://picsum.photos/200>'),
),
title: Text(
'Teddy Lee',
style: TextStyle(fontWeight: FontWeight.bold),
),
subtitle: Text('SniperFactory Teacher'),
trailing: Icon(Icons.search),
),
),
const SizedBox(
height: 8,
),
Text(
'수업인증',
textAlign: TextAlign.left,
style: TextStyle(
color: Colors.white,
fontSize: 18,
fontWeight: FontWeight.bold),
),
const SizedBox(
height: 8,
),
Container(
height: 140,
child: ListView(
scrollDirection: Axis.horizontal,
children: [
Container(
margin: const EdgeInsets.only(right: 8),
clipBehavior: Clip.hardEdge,
decoration: BoxDecoration(
borderRadius: BorderRadius.circular(24),
),
child: Image.network('<https://picsum.photos/300>'),
),
Container(
margin: const EdgeInsets.only(right: 8),
clipBehavior: Clip.antiAlias,
decoration: BoxDecoration(
shape: BoxShape.circle,
),
// decoration: BoxDecoration(
// borderRadius: BorderRadius.circular(24),
// ),
child: Image.network('<https://picsum.photos/400>'),
),
Container(
margin: const EdgeInsets.only(right: 8),
clipBehavior: Clip.hardEdge,
decoration: BoxDecoration(
borderRadius: BorderRadius.circular(24),
),
child: Image.network('<https://picsum.photos/500>'),
),
Container(
margin: const EdgeInsets.only(right: 8),
clipBehavior: Clip.hardEdge,
decoration: BoxDecoration(
borderRadius: BorderRadius.circular(24),
),
child: Image.network('<https://picsum.photos/600>'),
),
],
),
),
const SizedBox(
height: 16,
),
Text(
'설정찾기',
textAlign: TextAlign.left,
style: TextStyle(
color: Colors.white,
fontSize: 18,
fontWeight: FontWeight.bold),
),
const SizedBox(
height: 8,
),
Container(
decoration: BoxDecoration(
borderRadius: BorderRadius.circular(16),
color: Colors.white12,
),
child: Column(
children: [
ListTile(
leading: Icon(Icons.light_mode),
title: Text('테마변경'),
),
ListTile(
leading: Icon(Icons.favorite),
title: Text('즐겨찾는 과정 '),
),
ListTile(
leading: Icon(Icons.calendar_month),
title: Text('과정 일정 관리'),
),
ListTile(
leading: Icon(Icons.home),
title: Text('홈화면 설정'),
),
],
),
),
const SizedBox(
height: 8,
),
Container(
decoration: BoxDecoration(
borderRadius: BorderRadius.circular(16),
color: Colors.white12,
),
child: Column(
children: [
ListTile(
leading: Icon(
Icons.subscriptions,
color: Colors.redAccent,
),
title: Text('결제관리'),
),
ListTile(
leading: Icon(
Icons.shopping_bag,
color: Colors.purpleAccent,
),
title: Text('장바구니'),
),
ListTile(
leading: Icon(
Icons.history_edu_rounded,
color: Colors.green,
),
title: Text('결제이력'),
),
],
),
),
],
),
),
),
);
}
}
'개발 > Flutter' 카테고리의 다른 글
| Flutter 여섯 번째 강의 내용 (0) | 2022.11.01 |
|---|---|
| Flutter 네 번째 강의 내용 (0) | 2022.10.24 |
| Flutter 세 번째 강의 내용 (0) | 2022.10.21 |
| Flutter 두 번째 강의 내용 (0) | 2022.10.20 |
| Flutter 첫 번째 강의 내용 (0) | 2022.10.18 |